“Acts of Kindness” Workshop

By Paula Briggs


Portrait of Jan Brueghel I (1568-1625) and his family, by Peter Paul Rubens (Detail)

The day after Trump and Zelenskyy stunned the world with their televised argument in the Oval Office, AccessArt ran a “Constructing Positive Social Stories: Acts of Kindness” workshop session at the AccessArt Lab.

The event was one of a number of “Artists & Teachers Exploring Together” sessions, devised by AccessArt to give us an opportunity to think about some of the more philosophical issues behind art education. By working with artists and educators who are open to holding ideas lightly, we hope to collaboratively discover new arts educational approaches and activities, transferable to a variety of settings.

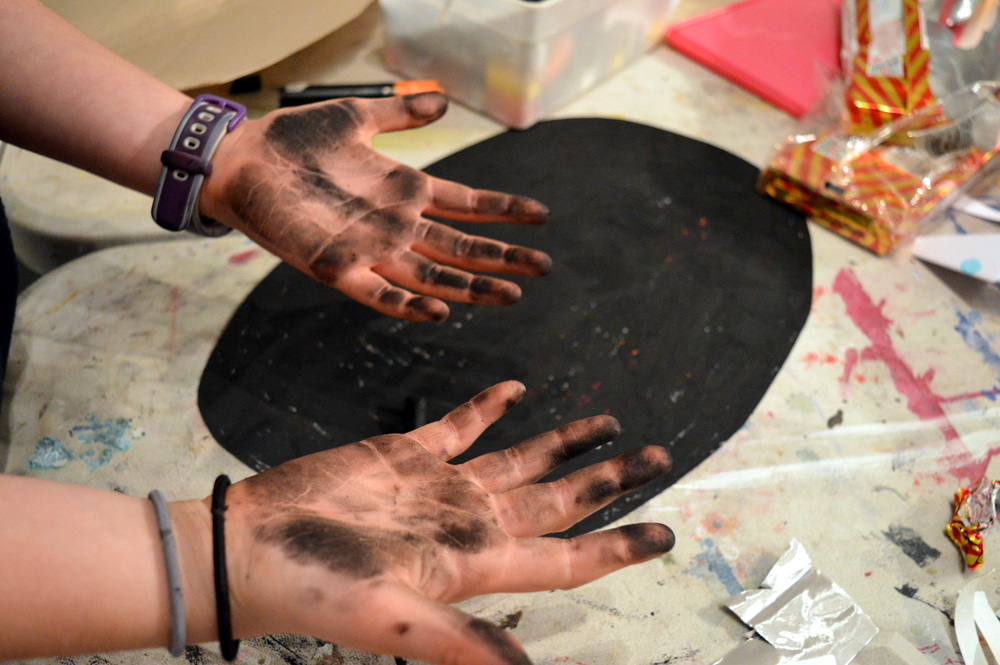
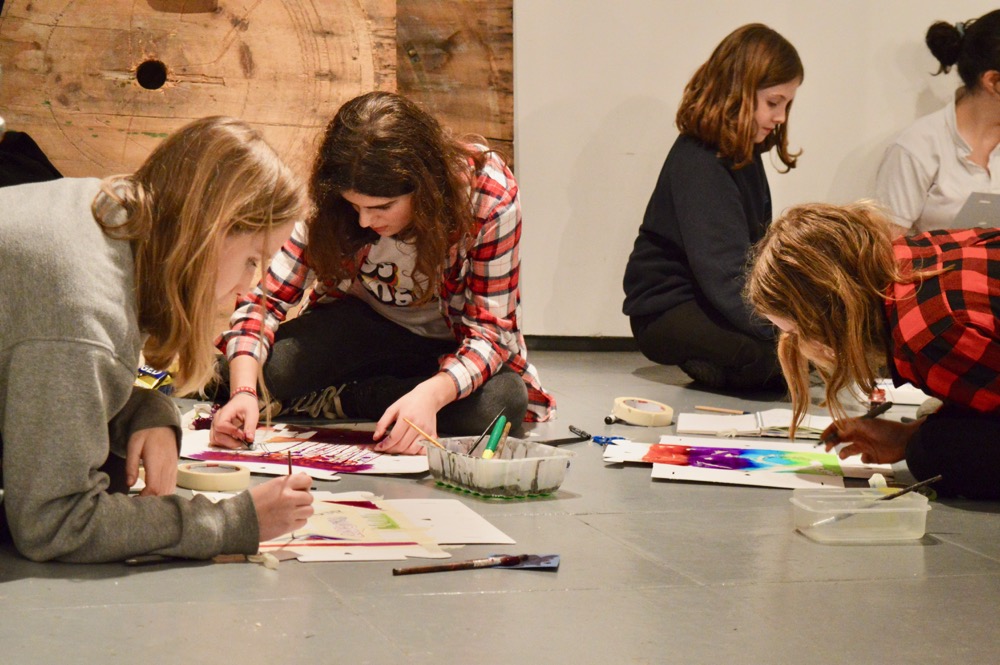
The idea behind this particular session was to explore how we can use making as a tool to help us focus more closely on the positives which surround us everyday, no matter how small. By creating a shared space for making and conversation, we hoped to lift spirits and create a sense of shared experience.

This post shares the session aims, some of the conversational highlights, and observations of the workshop attendees, and my own as facilitator. Thank you to all who attended, and for your generosity.

“A timely workshop this Saturday morning led by AccessArt. Reflecting individually on our own experiences of small kindnesses, and then choosing from a table of materials to abstractly or literally depict these, prompted conversation that magnified the acts beyond their original intent. The joy of creating by hand alongside others, of talking and making sense whilst sculpting and glueing, of sharing in stories of the smallest of acts that had made a difference to someone else… about people feeling seen, loved, heard. I left feeling lighter, more hopeful about the world, and with more generosity towards other drivers on my journey home.”


Please log in here to access full content.

Username
Password


Remember me
Forgot Password


To access all content, I would like to join as…

An Individual

Creative practitioners, educators, teachers, parents, learners…


An Organisation…

Schools, Colleges, Arts Organisations: Single and Multi-Users


AccessArt is a UK Charity and we believe everyone has the right to be creative. AccessArt provides inspiration to help us all reach our creative potential.


AccessArt Olympics: Sculptural Sneakers

<<Explore Other Olympic Themes

Explore the project below to help pupils consider how they might design trainers based on either Olympic Athletics.

Trainer Design

Aim: To introduce pupils to shoe design with a focus on athletics and trainers. Pupils will get the opportunity to explore innovation and design through drawing and making.

Step 1: Introduce in Sketchbooks

Begin by introducing pupils to trainer design with the “Talking Points: Trainer Design” resource. Show them a series of videos which aim to prompt discussion around innovation, design and environmental implications of shoe design. Invite pupils to create “Visual Notes” in their sketchbooks inspired by what they see.

https://www.youtube.com/watch?v=i59mVcTuUpI

Step 2: Drawing and Sketchbooks

Place a trainer on each table. Invite pupils to create their own “Folded Sketchbook” and set them drawing challenges by adpating the “Using a Folded Sketchbook to Get Drawing” using the shoe as the subject matter. For each different drawing exercise swap the shoes around.

Next, invite pupils to make annotations and adjustments to their drawings based on any invented shoe technology they would like to add to their trainers.

Shoes

Step 3: Making

Use air-dry clay to create trainers using the “Shoe La-La” resource. Bring in trainers as inspiration for the clay shoes. Use some of the techniques from the last step to build up the shoes.

IMG_1290

Or..

You may like to try creating “Sculptural Modroc Shoes” instead. Ask children to bring in old trainers, or pick up some from charity shops to use at the base for new trainer designs. Make additional features by creating small armatures and incorporating them into the shoe design.

sc1

Step 4: Reflect

Use the resource here to help you run a class “crit” to finish the project. 

Invite children to display the work in a clear space on tables or on the wall. Recap with them about the exploration – where they started, what they discovered and what they enjoyed.

If you have class cameras or tablets, invite the children to document their work, working in pairs or teams.

IMG_1281
AA Olympic Resources
ages 5-8
ages 9-11
ages 11-14

Materials:

Trainers as subject matter

Sketchbooks

A2 Paper

Drawing materials

For Shoe La-La:

Air-drying clay

Rolling pins

Burlap/hessian mat

Wooden battens

Tools for clay

Clay Slip (mix a lump of clay with water to create a creamy consistency and store in a jar with a sealed lid)

Acrylic Paint

PV Glue

For Sculptural Modroc Shoes:

Modroc

An old trainer

Acrylic Paint

Extra materials such as lollysticks or newspaper to make armatures

PVA glue


Adaptations:

You could look into shoe design for sports that don’t require trainers, for example dancing shoes or winter sports shoes.


Explore Other Resources in Athletics:

Making Medals

Making Medals

Sporting Sculptures

Sporting Sculptures

Sportwear Design

Sportwear Design

Explore other olympic themes

history

Portia's Lyre - Ancient Greeks - Sc

Values

Finished poster

ceremony

Final model using wood, foam, plastic and glue - susie olczak


Talking Points: Trainer Design

A collection of imagery and sources designed to explore trainer design.

Please note that this page contains links to external websites and has videos from external websites embedded. At the time of creating, AccessArt checked all links to ensure content is appropriate for teachers to access. However, external websites and videos are updated and that is beyond our control. 

Please let us know if you find a 404 link, or if you feel content is no longer appropriate.

We strongly recommend as part of good teaching practice that teachers watch all videos and visit all websites before sharing with a class. On occasion there may be elements of a video you would prefer not to show to your class and it is the teacher’s responsibility to ensure content is appropriate. Many thanks.

*If you are having issues viewing videos it may be due to your schools firewall or your cookie selection. Please check with your IT department.*

This resource is free to access and is not a part of AccessArt membership.

ages 5-8
ages 9-11
ages 11-14
free to access

Trainer Design

Explore the resources below to start discussions based on design, innovation and the environmental implications of trainer design.

Golden Trainers

Questions to Ask Children

What are the features of these track shoes?

Do you like the gold shoes? Why?

What colour would you like your trainers to be if you were an Olympian?

Tinker Hatfield: Footwear Design

Find highlights of the documentary by exploring the suggested clips below:

Innovation: Predicting Needs for the Future

  • Minute 7:41 – 11:23

  • Minute 16:00 – 18:45

  • Minute 24:36 – 26:20

  • Minute 36:36 – 38:00

Working with Athletes

  • Minute 19:33 – 24:36

  • Minute 27:33 – 29:04

Questions to Ask Children

Which shoe did you like the best? Why?

How can trainer design help with sports performance?

If you could invent some shoes right now, what would they do? Who would they be for?

Sustainability

Find out how manufacturing trainers impacts our environment.

See how design innovation can provide solutions to ease the environmental impact of shoes.

Questions to Ask Children

In pairs, invent some sustainable alternatives that you could use to replace the toxic chemicals used in the production of trainers, e.g. fabrics made from grass – get creative with your inventions!

You May Also Like…

AccessArt Olympic resources

Explore projects to celebrate the 2024 Olympics

Explore projects to celebrate the 2024 Olympics

Visual Notes

Find out how pupils can respond to artists work in sketchbooks

Find out how pupils can respond to artists work in sketchbooks

Show me what you see

Enable close looking and drawing with this exercise

Enable close looking and drawing with this exercise


AccessArt Olympics: Sporting Sculptures

<<Explore Other Olympic Themes

Explore the project below to help pupils create a sculptural figure inspired by Olympic Athletics.

Sporting Sculptures

Aim: To introduce pupils to the work of sculptors and painters inspired by human form with a focus on athleticism. Pupils will get the opportunity to create figurative drawings and develop their work through to sculpture.

Step 1: Introduce

Begin by introducing pupils to the sculptures made by Rosa Serra, commissioned for the Seoul 1988 Olympics, with “Talking points: Rosa Serra“.

Invite pupils to create “Visual Notes” in their sketchbooks inspired by the information they see.

Rossa Serra

Use “Drawing Source Material: Athletes in Action” material for pupils exploring the human form during sports. In the first instance you might want to pause the videos as suitable points to enable the children to carefully look at the main forms and details.

Encourage close and slow looking by talking as they draw – use your voice to attract their attention to features of the athletes.

Invite pupils to draw what they can see in their sketchbooks. See “Show Me What You See” to find out how to run the guided session.

https://vimeo.com/289070073

Step 2: Drawing and Sketchbooks

Start the session by introducing choreographer and painter Serge Lifar to pupils using “Talking Points: Serge Lifar“. Use the questions to prompt discussions about how he captures moving forms through line and colour.

Follow on by using the “Exaggerating To Communicate” resource to help children draw from life, and explore how we might use exaggeration as a tool to help us convey the intention of our drawing. Invite children to get into a position relating to a sport they like or they saw in the Drawing Source Material above. You might like to introduce props.

detail3

Step 3: Making

Follow on by adapting the “Plinth People” resource, inspired by the work done so far.

Invite pupils to think about a movement they would like to capture in their sculptures and whether this is reflected in a particular sport.

Encourage pupils to think about how they can bring exaggerated form, colour and shape to their sculptures.

Binding the figures with strips of cloth

Step 4: Reflect

Use the resource here to help you run a class “crit” to finish the project. 

Invite children to display the work in a clear space on tables or on the wall. Recap with them about the exploration – where they started, what they discovered and what they enjoyed.

If you have class cameras or tablets, invite the children to document their work, working in pairs or teams.

Swimming front crawl
AA Olympic Resources
ages 9-11
ages 11-14

Materials:

Sketchbooks

A3 Cartridge Paper

Drawing materials

Watercolour

Soft wire

Wire cutters

Plaster for the plinth

Cardboard

Scrap fabric strips

PVA glue


Adaptations:

If you are working with younger children and would prefer to use modroc instead of clay you can adapt the “Friendship Tower” resource.


Explore Other Resources in Athletics:

Making Medals

Making Medals

Sculptural Sneakers

Sculptural Sneakers

Sportswear Design

Sportswear Design

Explore other olympic themes

history

Portia's Lyre - Ancient Greeks - Sc

Values

Finished poster

ceremony

Final model using wood, foam, plastic and glue - susie olczak


AccessArt Olympics: Ancient Greek Architecture

<<Explore Other Olympic Themes

Explore the project below to help pupils discover Ancient Greek architecture inspired by Olympic History.

Ancient Greek Architecture

Aim: Pupils will explore Ancient Greek architecture through sketchbooks, collage and sculpture.

Step 1: Introduce in Sketchbooks

Consider asking pupils to make an Olympic project sketchbook using one of the “Making Sketchbooks” resources.

Begin by introducing pupils to the first ever Olympic stadium in Olympia with “Talking Points: Olympic and Paralympic Stadiums“. Use the questions to prompt discussion.

Follow on in sketchbooks with a drawing activity, exploring architecture using “Drawing Source Materials: Ancient Greek Architecture” as a drawing prompt.

Invite pupils to create drawings inspired by the source material using the “Show Me What You See” method. You can find a case study for this method inspired by Anglo Saxon architecture which will need to be adapted.

Show Me What You See Through Drawing

Step 2: Drawing

Adapt the “Houses From Around The World” resource to create textured collage drawings inspired by Ancient Greek Architecture. Invite pupils to look at the range of marks and lines made in sketchbooks in the previous session and build upon them.

If you would like to focus on making skills you may like to skip this step.

Looking at detail and drawing with black pen

Step 3: Making

Create Sculptures with Personality inspired by the “Sculptures with Personality, Inspired by anglo Saxon Houses” resource.

Making “sculptures” rather than “models” enables pupils to grow their ideas in individual directions, using the architecture of Ancient Greek buildings as a starting point.

Sculpture Inspired by Anglo Saxon Houses

Step 4: Reflect

Use the resource here to help you run a class “crit” to finish the project. 

Invite children to display the work in a clear space on tables or on the wall. Recap with them about the exploration – where they started, what they discovered and what they enjoyed.

If you have class cameras or tablets, invite the children to document their work, working in pairs or teams.

"Creative"
AA Olympic Resources
ages 5-8
ages 9-11
ages 11-14

Materials:

Sketchbooks

A3 cartridge and newsprint paper

Drawing materials

Making Materials: Card, Corrugated cardboard, Coffee stirrers, Lolly sticks, Twigs, Toothpicks, Wire (various thicknesses for structure and binding), String, Withies, Hessian, Calico, Felted Wool

PVA Glue

Pliers

Scissors

Glue Guns


Adaptations:

You could invite pupils to create sculptures inspired by a modern Olympic stadium.


Explore Other Resources in History

Making Medals

Making Medals

Sportswear Design

Sportswear Design

An Olympic Poster

An Olympic Poster

Explore other olympic themes

Athletics

Finished "Runner"

Values

Finished poster

ceremony

Final model using wood, foam, plastic and glue - susie olczak


AccessArt Olympics: Friendship Towers

<<Explore Other Olympic Themes

Explore the project below to help pupils consider how they might create a collaborative sculpture inspired by the Olympic Values or Ceremony.

Friendship Towers

Aim: To introduce pupils to the ethos of the Olympics and create a body of work in response. Pupils will get the opportunity to practise their making skills and will go on to create a collaborative sculptural piece based on the Olympic values.

Step 1: Introduce

Begin by introducing pupils to the Olympic and Paralympic ethos and the 3 values Friendship, Respect and Excellence with “Talking Points: The Olympic Ethos“. Watch the videos and invite pupils to create “Visual Notes” in their sketchbooks inspired by what they see and hear. Prompt discussion using the questions.

https://youtu.be/3SuKNmLBOpE

Step 2: Make

Using the “Prompt Cards for Making” as inspiration, devise your own challenges for the children such as…

“Make something which represents friendship.”

“Make a team of things.”

AccessArt Making Prompt Cards Saatchi Learning Workshop By Lala Thorpe

Step 3: Continue Making and Sketchbooks

Decide whether you would like the friendship tower to celebrate the values through an exploration of nationalities, athleticism or the opening ceremony performance.

Use “Drawing Source Material: Ceremonies and Celebrations” to explore the performances, costumes and national teams in the Olympic ceremonies.

Or if your class is using athletics to celebrate the values then explore the videos in “Drawing Source Material: Athletes in Action“.

Invite pupils to draw what they can see in their sketchbooks. See “Show Me What You See” to find out how to run the guided session.

Screenshot 2024-03-12 at 11.53.51

Follow on by using the “Friendship Tower” resource, inspired by the work done so far.

Invite pupils to think about a position of their figures. Are the sculptures waving to the crowd? Performing a dance? Playing a sport together? Invite pupils to think about what the figures are wearing and how that reflects who they are and what they do.

A carnival with added feathers

Step 4: Reflect

Use the resource here to help you run a class “crit” to finish the project. 

Invite children to display the work in a clear space on tables or on the wall. Recap with them about the exploration – where they started, what they discovered and what they enjoyed.

If you have class cameras or tablets, invite the children to document their work, working in pairs or teams.

A Brazillian football team
AA Olympic Resources
ages 5-8
ages 9-11
ages 11-14

Materials:

Sketchbooks

A3 Cartridge Paper

Drawing materials

Making Materials: Card, Coffee stirrers and/or lolly sticks, Twigs, Foam board, Toothpicks, Wire, String, scrap fabric etc

Soft wire

Wire cutters

Plaster for the plinth or wooden base, and a stick

Modroc

Acrylic Paint


Adaptations:

Ensure you adapt the content to align with the focus of the project, ie. Ceremony or Values.

You might like to focus on designing clothing, using the sculptures as mannequins. Incorporate and adapt “Fashion Designs with Painted and Decorated Paper“.


Explore Other Resources in Values:

Mascot Design

Mascot Design

Making Medals

Making Medals

An Olympic Poster

An Olympic Poster

Explore other olympic themes

history

Portia's Lyre - Ancient Greeks - Sc

athletics

Finished "Runner"

ceremony

Final model using wood, foam, plastic and glue - susie olczak


Returning to Our Bodies – Poised Between The Slip and The Grub


Coat-hanger Shells

You Might Also Like…

Drawing and Making Flowers

Student creates texture and colour by mark making onto a sculptural flower

Painted and Sculptural Plant Pots

A finished collaged plant made with painted card and wire.

Drawing Insects with Wire

Lottie makes her wire 'drawing' inspired by her continuous line drawing of a moth


Session Recording: Exploring Modroc

You May Also Like…

Pathway: Using Art To Explore Global Issue

This is featured in the 'Using Art To Explore Global Issue' pathway

This is featured in the ‘Using Art To Explore Global Issue’ pathway

Pathway: Festival feasts

This is featured in the 'Festival Feasts' pathway

This is featured in the ‘Festival Feasts’ pathway

Pathway: Telling Stories Through Drawing and Making

This is featured in the 'Telling Stories Through Drawing and Making' pathway

This is featured in the ‘Telling Stories Through Drawing and Making’ pathway

Pathway: Drawing and Making Inspired by Illustrators

This is featured in the 'Drawing and Making Inspired by Illustrators' pathway

This is featured in the ‘Drawing and Making Inspired by Illustrators’ pathway

accessart modroc resources

Modroc finger puppet


Making a Treehouse

You May Also Like…

Pathway: Stick Transformation project

This is featured in the 'Stick Transformation Project' pathway

This is featured in the ‘Stick Transformation Project’ pathway

Talking Points: treehouses

Treehouse Vimeo Screenshot


Talking Points: What Is A Plinth?

A collection of imagery and sources designed to encourage children to consider what role a plinth may play in creating or displaying artwork. 

Please note that this page contains links to external websites and has videos from external websites embedded. At the time of creating, AccessArt checked all links to ensure content is appropriate for teachers to access. However external websites and videos are updated and that is beyond our control. 

Please let us know if you find a 404 link, or if you feel content is no longer appropriate. 

We strongly recommend as part of good teaching practice that teachers watch all videos and visit all websites before sharing with a class. On occasion there may be elements of a video you would prefer not to show to your class and it is the teacher’s responsibility to ensure content is appropriate. Many thanks. 

*If you are having issues viewing videos it may be due to your schools firewall or your cookie selection. Please check with your IT department.*


This resource is free to access and is not a part of AccessArt membership.


ages 9-11
ages 11-14
free to access

What Is A Plinth?

Silver-gilt mouthpiece late 6th–5th century B.C

“Limestone plinth with the feet of a male statuette” Licensed under CC0 1.0

In the traditional sculptural sense, plinths are usually heavy boxes or bases made from stone, wood or metal, which raise a sculpture above the ground.

Plinths sometimes protect the sculpture from the elements, such as a sculpture raised out of the way of puddles of rain in the street. 

More often, the role of a plinth is to give the sculpture some kind of status. By raising the sculpture to a certain level, the sculptor can decide how the viewer interacts with the artwork. 

Plinths also help create a separation between the ordinary everyday world around us and the art “object”. 

Seeing an object on a plinth might encourage us to view that object as an artwork – as something special. 

Questions to Ask Children

Have you seen any sculpture on a plinth in and around the place where you live?

Why do you think those sculptures are on plinths? How does the way the sculpture is displayed affect how you think about the sculpture?

Imagine two peas. One is on the kitchen floor, but an identical pea is on a plinth in a gallery. How does it change how you think about the pea? 

The Fourth Plinth

Photo of Fourth Plinth, Trafalgar Square, London by Andy Hay

Photo of “Nelson’s Ship in a Bottle,” by Yinka Shonibare, Fourth Plinth, Trafalgar Square, London by Andy Hay

What is The Fourth Plinth?

The Fourth Plinth is considered to be one of the world’s largest ongoing public art commissions. Its main aim is to bring contemporary art to the public and to encourage debate about what art is.

The Fourth Plinth

The “fourth plinth” was originally intended to hold a sculpture of a horse belonging to William IV, but the sculpture was never displayed due to lack of money. For over 150 years the plinth remained empty, until in 1998, the Royal Society for the Encouragement of Arts, Manufactures and Commerce (RSA) commissioned three contemporary sculptures to be displayed temporarily on the plinth. The legacy of those three sculptures was a rolling programme called the Fourth Plinth.

Take a look at the Fourth Plinth website to explore some recent commissions and explore the work of one Fourth Plinth artist, Antony Gormley below. 

Antony Gormley, The Fourth Plinth

"One and Other" by Anthony Gormley, Image by Feggy Art

“One and Other” by Antony Gormley, Image by Feggy Art

Whilst Antony Gormley usually makes sculpture out of more traditional materials like steel, he was commissioned as part of the Fourth Plinth to produce a rather different kind of art. 

Instead of working in traditional materials, Gormley used the plinth as a focus for creating an artwork which “became a portrait of the UK, now”. For 100 days in 2009, 24 hours a day, Gormley and the team coordinated members of the public to take stage on the plinth for an hour at a time. They could do whatever they liked, using the plinth to give their expression a literal and metaphorical platform. 

Through “One & Other”, Gormley hoped that by giving the public free will to express their hopes and fears for what might be,  a “portrait of the nation” would be revealed.

Questions to Ask Children

How would you use your time if you were given an hour on the plinth?

The Fourth Plinth Challenge

Can you find a “plinth” at school and coordinate a similar project?

How would children and teachers “apply” for a slot on your plinth?

Who would decide who gets a slot and what would your criteria be?

How long would each slot last?

How would you encourage an audience?  

How would you document the event?

This Talking Points Is Used In…

Pathway: The Art of Display

This is featured in the 'The Art of Display' pathway

This is featured in the ‘The Art of Display’ pathway

using sketchbooks to make visual notes

Find out how pupils can respond to artists work in sketchbooks

Find out how pupils can respond to artists work in sketchbooks

Show me what you see

Enable close looking and drawing with this exercise

Enable close looking and drawing with this exercise


How Do We Look At Contemporary Sculpture: Mel Woo


How Do We Look At Contemporary Sculpture: Victoria Rotaru


Making is Hard


The Transformation Project

You May Also Like…

cardboard detail 3b

Transforming Cardboard with Andrea Butler

Artist Andrea Butler shows how to explore simple design and construction using cardboard and jewellery. Read More


Working with Dogwood

What We Like About This Resource….

“It’s lovely to see a resource that centres on a particular material and the scope it offers. I particularly like how the dogwood is used here to make wooden beads. This idea could be developed further by looking at how wood has been used to make jewelry throughout history and within many different cultures.” – Rachel, AccessArt.

You Might Also Like….

A Passion for Woodworking

A Passion for Woodworking

Woodland Exploration

Woodland Exploration

Visual Arts Planning: Trees, Forests and Landscape

Visual Arts Planning: Trees, Forests and Landscape


Rosie Hurley: Esio Trot

What We Like About This Resource…

“Rosie highlights the importance of embracing a wide variety of interests and ways of working into our wider creative practice, resulting in wonderfully rich and very personal explorations and outcomes.

There are so many clues in this resource for teachers. Look out for how Rosie slows down her whole process into a series of interconnected stages, which weave in and out of each other. These include time for research (collecting and observing), analysing and revisiting, drawing, making and finally documenting.” Paula, AccessArt

You Might Also like…

Pathway: Telling Stories through drawing and making

This is featured in the 'Drawing Stories Through Drawing and Making' pathway

This is featured in the ‘Drawing Stories Through Drawing and Making’ pathway

Pathway: Set Design

This is featured in the 'Set Design' pathway

This is featured in the ‘Set Design’ pathway

talking points: negative space by tiny inventions

Negative space by Tiny Inventions https://vimeo.com/238590794

Gabby Savage-Dickson: Felting & Embroidering Sets

Felting Details by Gabby Dickson

Year 3 Roald Dahl & Quentin Blake Homework

The BFG by Portia

Draw, Paint, Build, Make: Gallery Project

Making a “To Scale” Gallery by Paula Briggs


Roots & Shoots: A Sculptural Challenge

See This Resource Used In Schools…

Year 2, St Clare's Primary School, Coalville, Leicestershire
Year 2, Whitchurch Primary

You May Also Like…

Pathway: Stick Transformation project

This is featured in the 'Stick Transformation Project' pathway

This is featured in the ‘Stick Transformation Project’ pathway


Sculptural Challenge No 1: Colourful Walls

A sculptural challenge encouraging the exploration of colour.

ages 9-11
ages 11-14

Artwork by Krijn de Koning

Questions for Children

How would it feel to be in the spaces Krijn creates?

How do you think he chooses the colour for each wall? How do you think the shape and size of the wall affects the colour too?

Find more of Krijn’s work here.

Sculptural Challenge! 

Use Krijn’s work as your inspiration, think about how you might make a series of colourful walls. You won’t be building a life-size sculptural installation (not today anyway!) but instead you can either make a model or create a piece of 2d artwork which shares your vision. Remember, because you are not creating the artwork then you can really be imaginative and dream!

Here are some clues, but you may have your own ideas too:

Use your sketchbook to “collect” colours that you like. Find them in magazines by cutting swatches out, find them by mixing paints, find them by mixing other materials. Record them, test them, label them, make notes (what colours did you mix?), name them (the names you give them might help you to describe the affect they have on you).

Next think about what the “walls” would be like. What shape? What size? Would they enclose? Would they have holes? Would there be a roof? How do they connect? How would the person get in to the space? How would you want the person to feel? Again, use your sketchbook to plot and plan. 

Think too about the location or context you would like your sculptural installation to be in. Would you like it to be in the Antarctic? The jungle? The high street? Again, use your sketchbook. 

Think about how you would apply your colours to the walls? Would each wall be one colour? Would you introduce pattern? Images? Again, use your sketchbook.

Finally, either make a model using card, paint, fabric etc to share your vision, or make a 2d artwork. 

You May Also Like…

Pathway: Brave Colour

This is featured in the 'Brave colour' pathway

This is featured in the ‘Brave colour’ pathway

Talking Points: Yinka Ilori

See how Yinka Ilori transforms spaces with colour and pattern

See how Yinka Ilori transforms spaces with colour and pattern

Talking Points: Morag Myerscough

Explore installations and immersive spatial artworks that transform places

Explore installations and immersive spatial artworks that transform places


Sculptural Challenge No 2: Colour, Light and Form

A sculptural challenge to encourage the exploration of colour, light and form.

ages 9-11
ages 11-14

Questions for Children:

Can you imagine what it would be like to be in a room with the installations in the videos above? How would it make you feel? What do they remind you of?

How do you think the colour affects the mood?

Sculptural Challenge! 

Using the artwork in the videos above as your inspiration, think about how you might design a sculptural installation which involves light, form and colour. 

You won’t be building a life-size sculptural installation (not today anyway!) but instead you can either make a model or create a piece of 2d artwork which shares your vision. Remember, because you are not creating the artwork then you can really be imaginative and dream!

Here are some clues, but you may have your own ideas too:

Use your sketchbook to “collect” colours that you like. Find them in magazines by cutting swatches out, find them by mixing paints, find them by mixing other materials. Record them, test them, label them, make notes (what colours did you mix?), name them (the names you give them might help you to describe the affect they have on you).

Think about the kinds of forms (shapes) you would like the coloured light to fall on to. Would you like the coloured light to surround a person, or would you like the person to pass near the objects? How would the person enter the space? Would the space be very small or very large? How would you want the person to feel? Again, use your sketchbook to plot and plan. 

Think too about the space you would like the coloured light to be in. Would you like it to be a dark space so that the lights show up against the darkness, or would you prefer a light space, so that it feels floaty and ephemeral? 

Think about how you would apply your colours to the walls? Would each wall be one colour? Would you introduce pattern? Images? Again, use your sketchbook.

Finally, either make a model using card, paint, fabric etc to share your vision, or make a 2d artwork. If you make a small space, you might like to be inspired by the Mini Art World Resource and use coloured filters and torches to replicate the space. 

You May Also Like…

Pathway: Brave Colour

This is featured in the 'Brave colour' pathway

This is featured in the ‘Brave colour’ pathway

Talking Points: Carnovsky

Explore different colour profiles and see how light can transform art

Explore different colour profiles and see how light can transform art

Which Artists: Liz West

Find out how Liz West is inspired by light, colour and reflections

Find out how Liz West is inspired by light, colour and reflections

Talking Points: Olafur Eliasson

See how Eliasson uses elemental materials such as light, water, and air temperature

See how Eliasson uses elemental materials such as light, water, and air temperature