By Inbal Leitner
In this video, Illustrator Inbal Leitner takes us through her Sketchbook documenting the development of her illustrations for poem ‘Growing Up’ by Harry Behn.

I’m Inbal and I’m an illustrator. You may already know that illustrations are images that are found usually next to a text, like in books, magazines, and newspapers. Sometimes when I read stories or poems, all kinds of ideas and images jump into my mind. That’s why I usually carry my sketchbook with me everywhere I go.
One day, I was walking in the forest with my family and suddenly it reminded me of a poem I’ve known for many years. I sat down and wrote that poem in my sketch book and started drawing the forest.
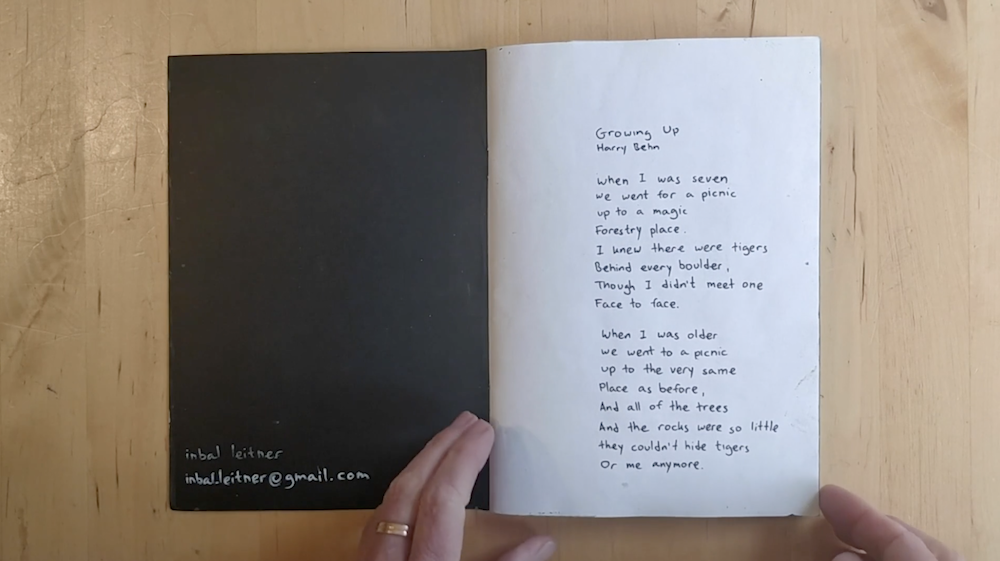
Later on, whenever I had an idea or an image that popped into my mind, I put it down in my sketchbook. Let’s read the poem first, and then I’d like to share my sketchbook with you. It’s called Growing Up by Harry Behn.
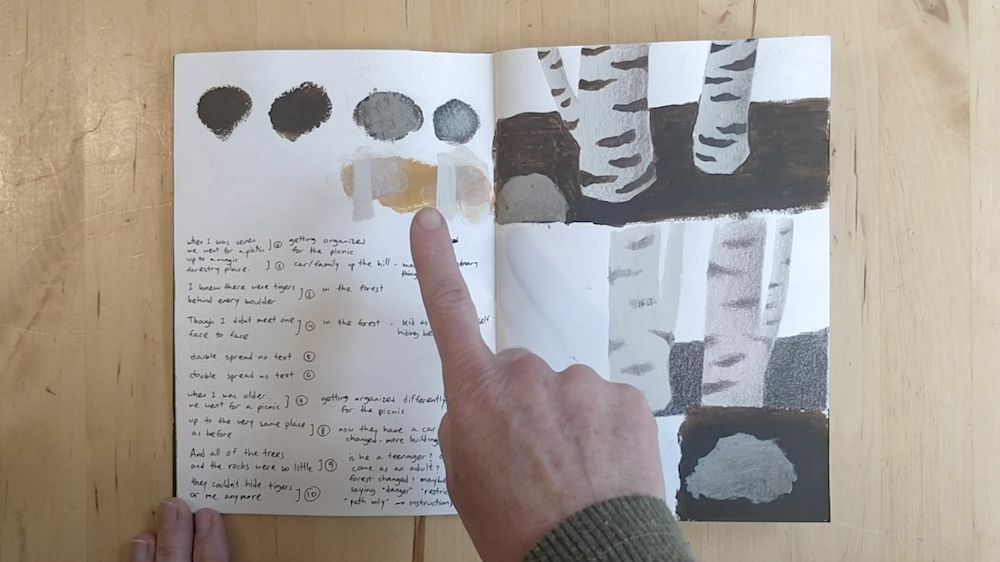
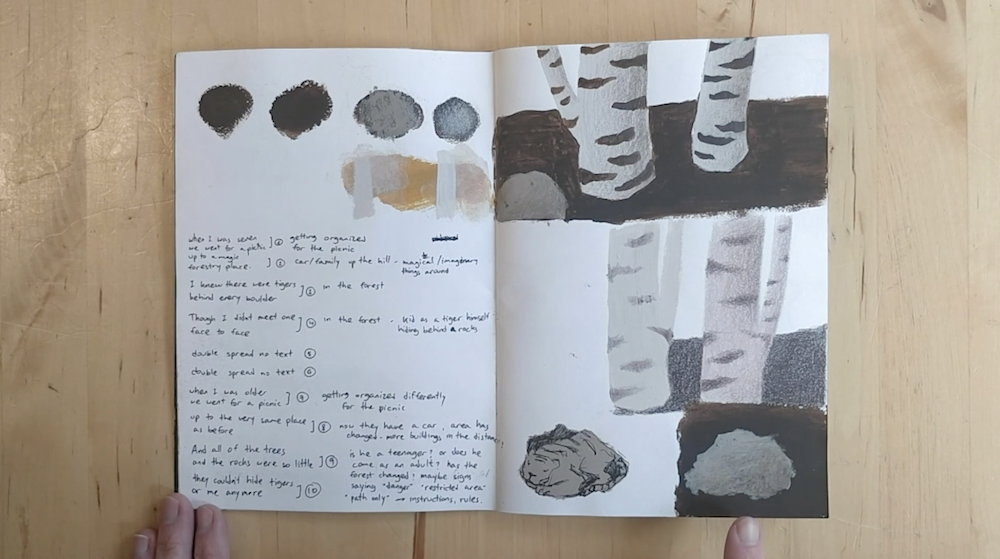
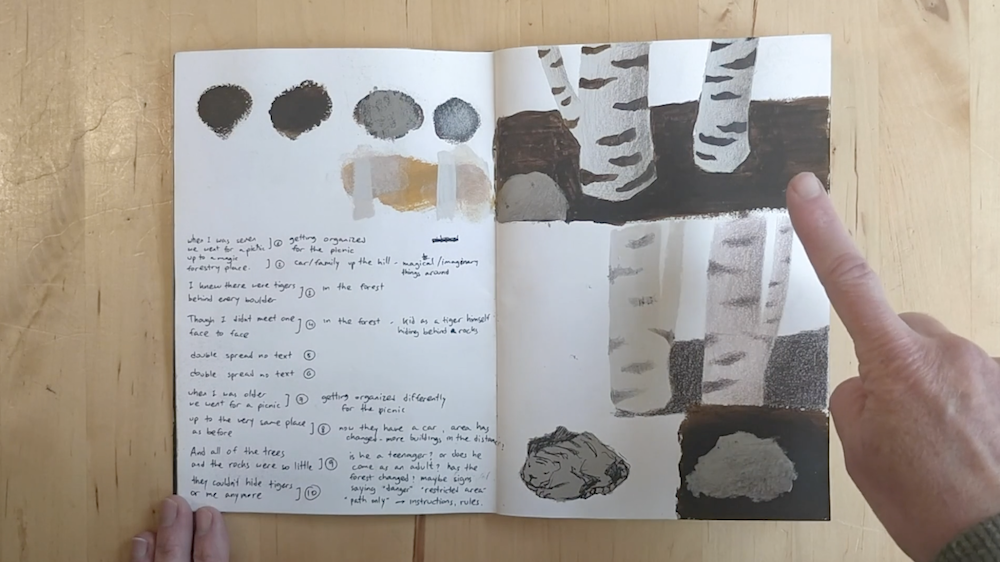
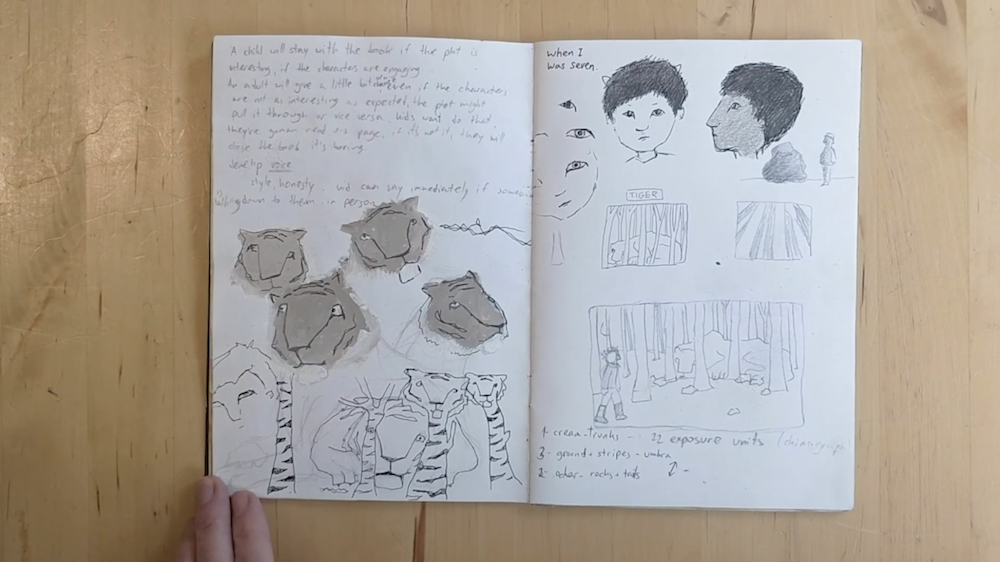
When I was seven,
we went for a picnic
up to a magic foresty place.
I knew there were tigers
behind every boulder
though I didn’t meet one face to face.
When I was older,
we went for a picnic
up to the very same place as before.
And all of the trees
and the rocks were so little,
they couldn’t hide tigers or me anymore.
So this is the poem and this is the first drawing in the sketchbook. Can you spot the little boy and the huge, huge trees in the forest? I started thinking, what if there were tigers in that forest?
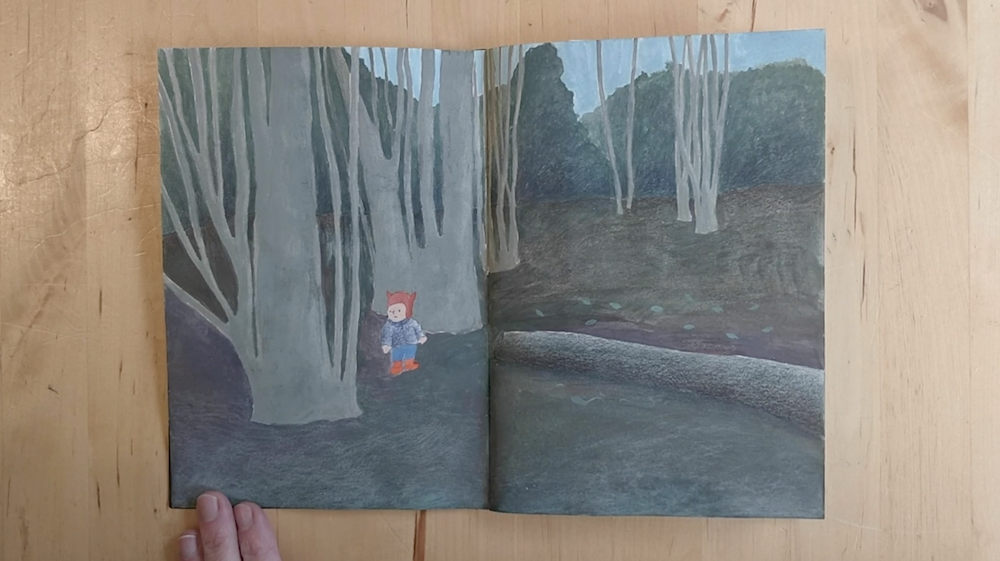
Can they hide behind trees?
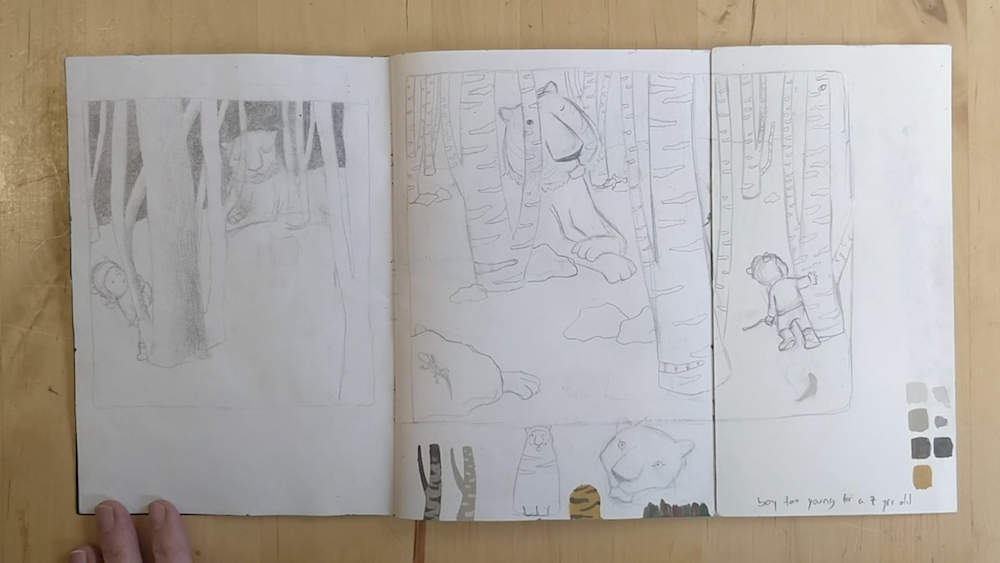
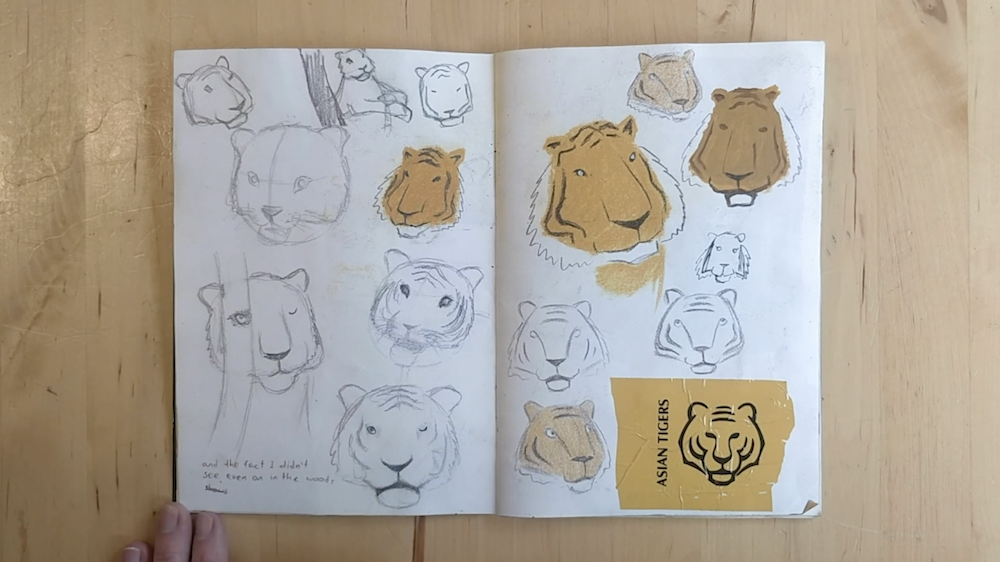
Here is a tiger. And here’s a tiger. Take notice of this tiger with the eye, we’ll see it later.
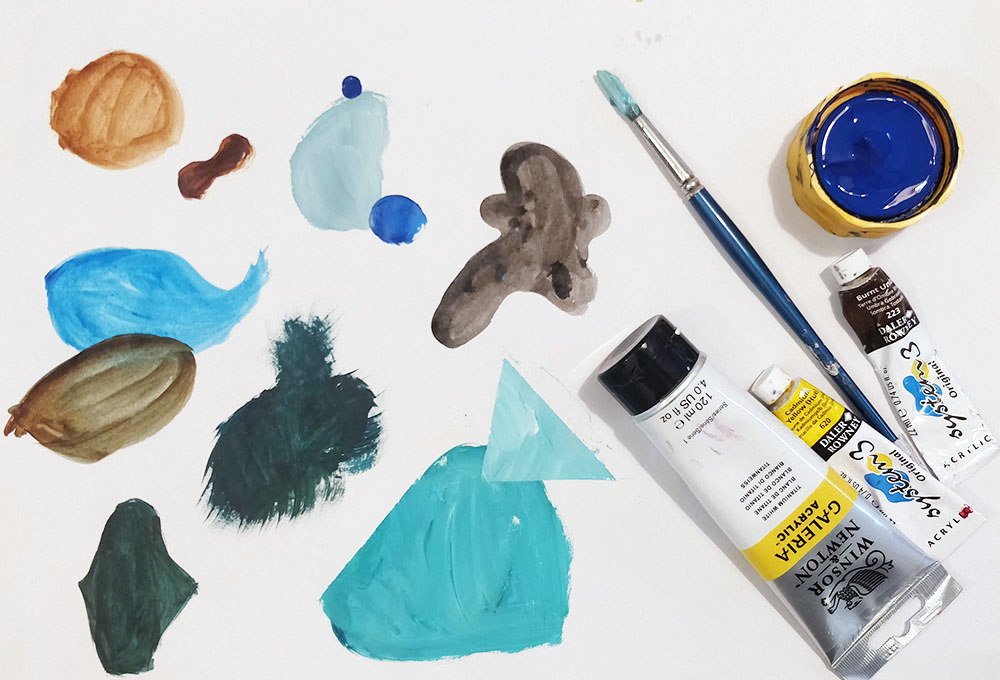
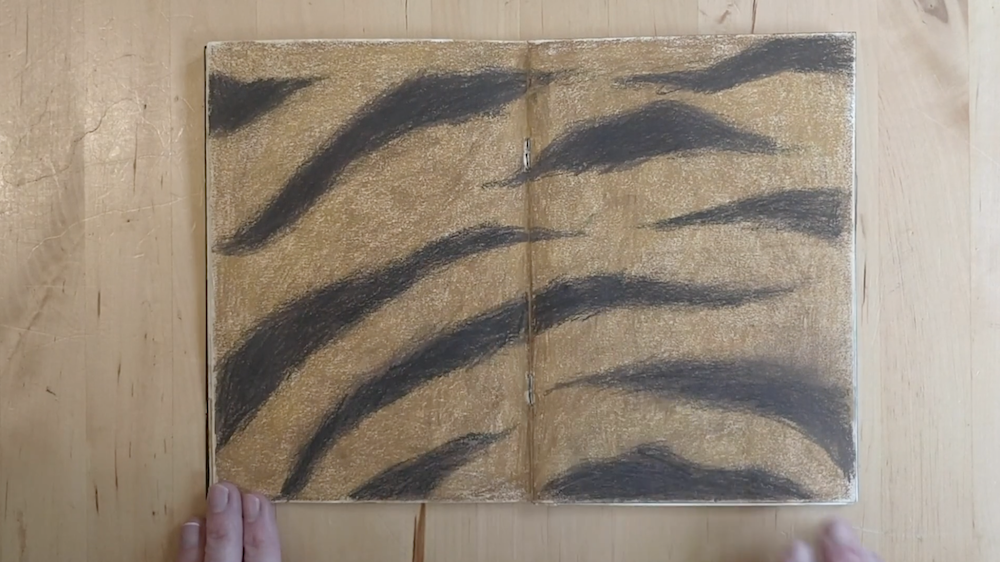
I started thinking of colours. I also thought, how can tigers actually hide behind rocks? They’ll have to be very small or fold their body in different ways. I also thought about colours that hide behind other colours.
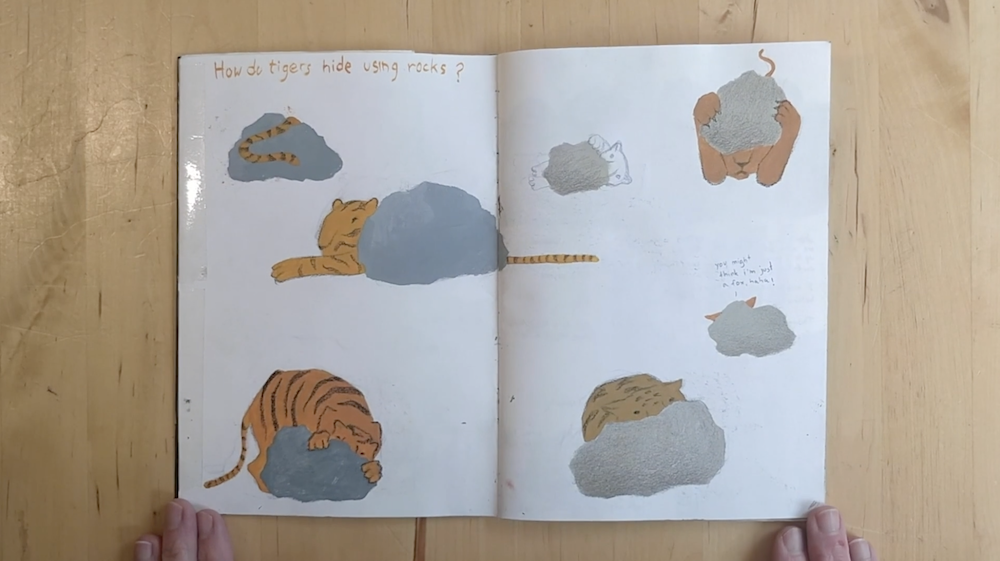
So here I got light brown covering darker browns or this creamy colour covering this mustardy colour. And I try to think of colours.
Can they hide behind each other? Can you see the connection between this image…
and this image…
and this image?
I started looking for the tiger. There are all kinds of options. I started exploring the facial expressions and facial features tigers. And I think, at some point, I met this one again with the eye and here is the tiger that I thought would be my tiger for the poet.
Here’s another exploration of trying to figure out if tigers can hide behind rocks. Then I thought, can all the tigers hide behind many rocks in the forest?
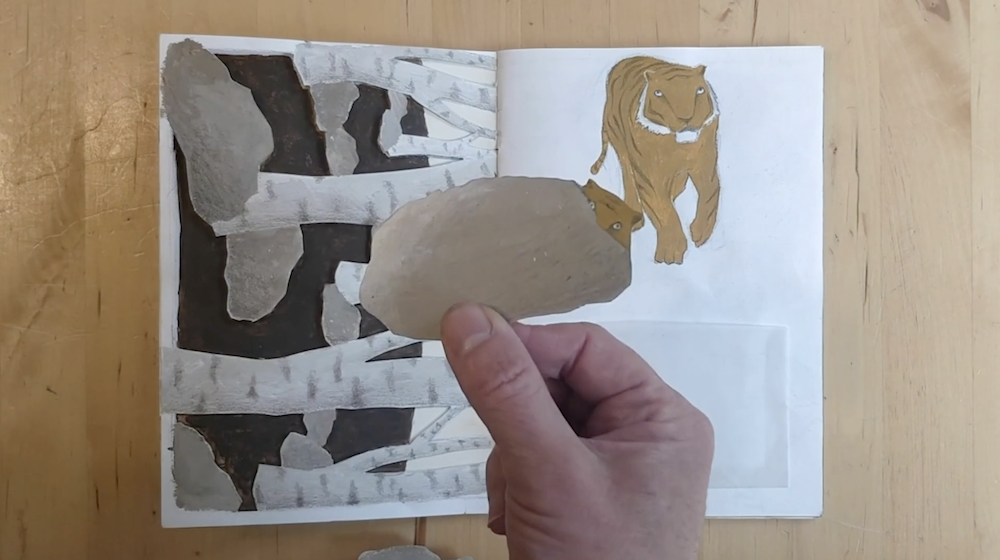
Then I thought, what if the forest is filled with rocks? What if behind every rock, there is a tiger. Just like in the poem.
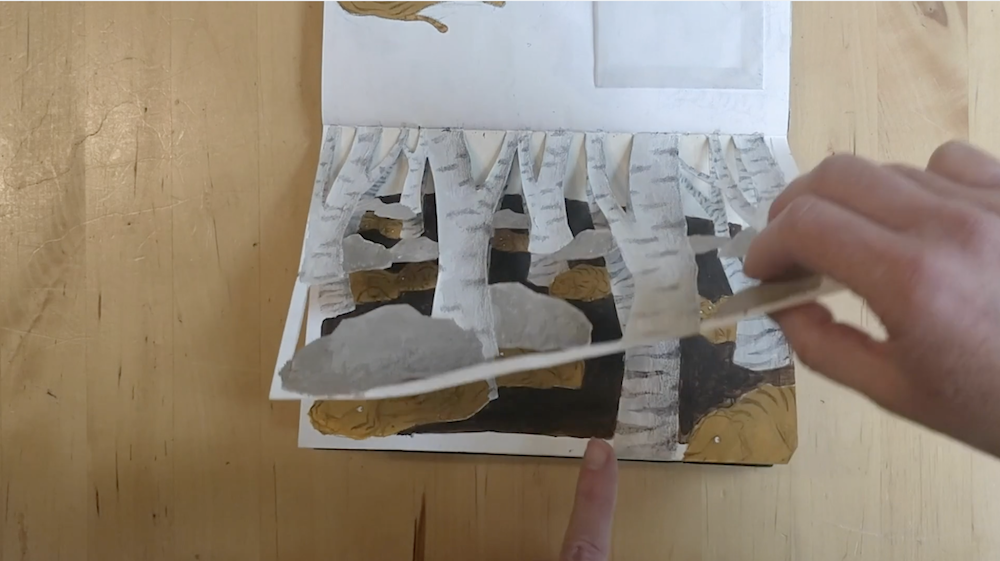
Here, I’m thinking again, about the shapes as a combinations formed when tigers and trees are in the same place. I’m looking for the boy, trying to find his face.
I’m thinking of a tiger’s fur, the softness of that fur.
And here, I’m thinking of the differences between the first picnic, when there were tigers everywhere. And the second picnic, when he was older and they went to a picnic. Up to the very same place as before.
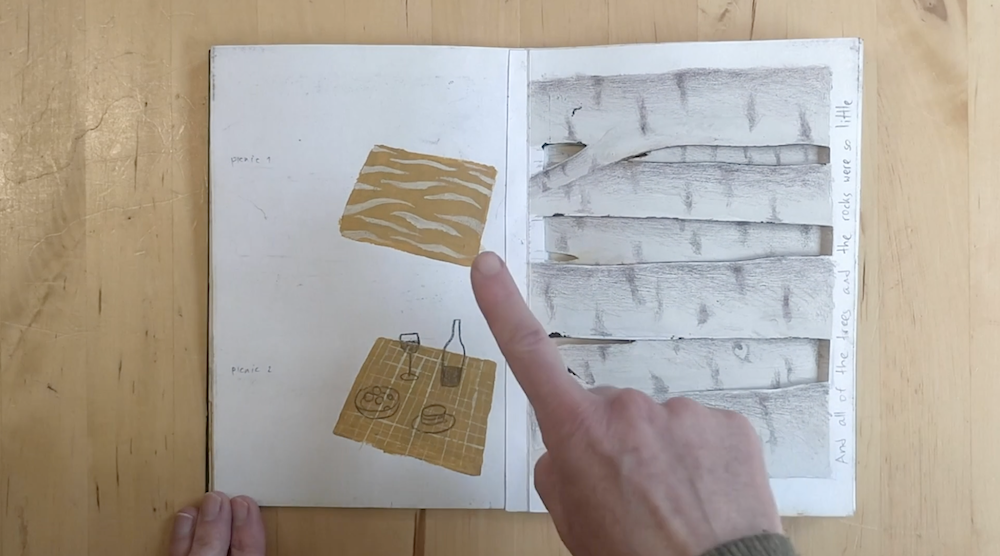
And all of the trees and the rocks were so little…
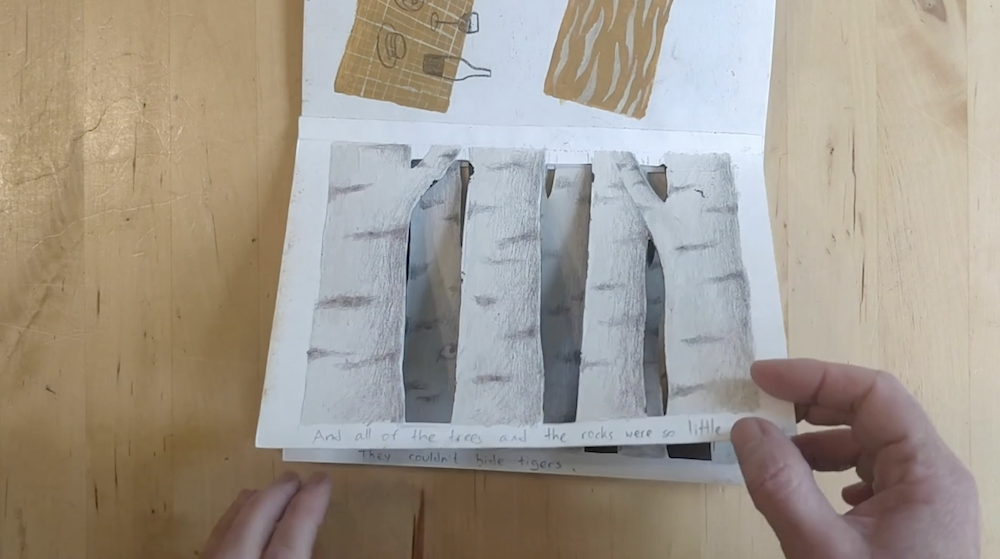
they couldn’t hide tigers…
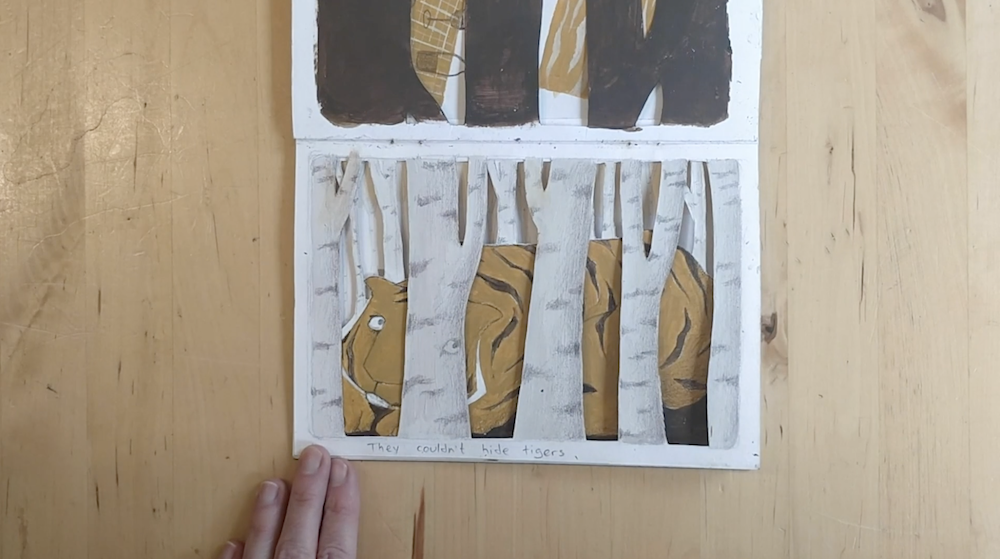

or me anymore.
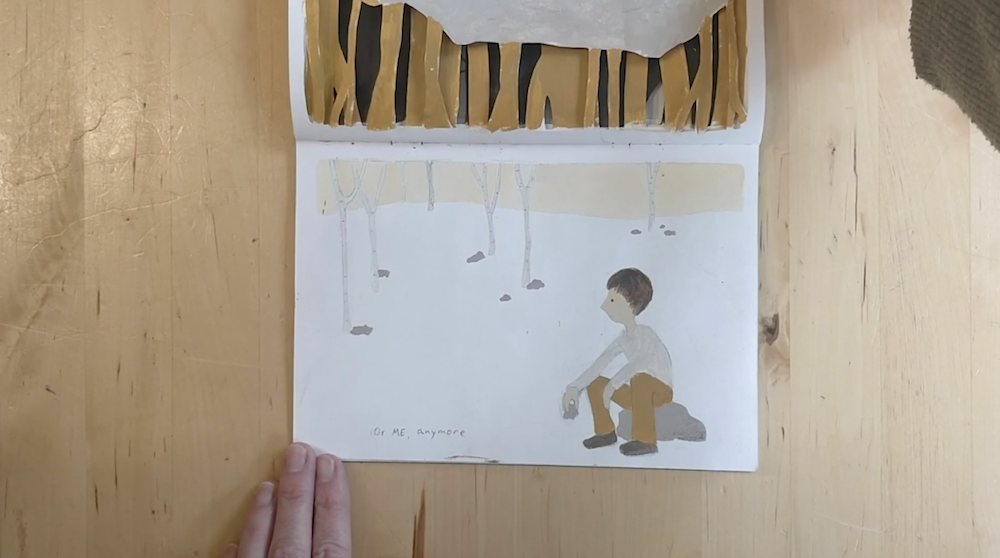
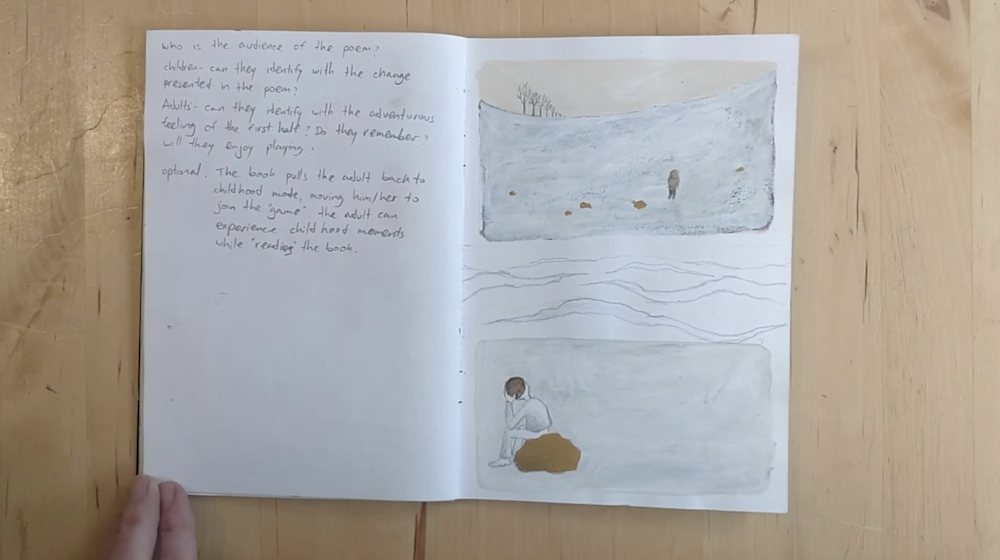
And that image got me to think of the feeling of that boy. I was wondering whether he is sorry for not seeing the tigers in the second time. I was wondering if he felt that he lost something by growing up.
And that made me draw these two images. There’s more space in the sketchbook, which I will be filling in the future. There are endless possibilities to developing ideas to a story or a poem. You can take it anywhere you want. Start with a sketchbook where you can draw and stick your craziest ideas.
You don’t have to fill the sketchbook in one or two days. It can be on your desk or shelf. And whenever you have an idea, a thought or something you’d like to explore, just open the sketchbook and have a go.
Good luck.
Explore how you can fill your own sketchbook capturing the elements of a poem just like Inbal.
This is a sample of a resource created by UK Charity AccessArt. We have over 1500 resources to help develop and inspire your creative thinking, practice and teaching.
AccessArt welcomes artists, educators, teachers and parents both in the UK and overseas.
We believe everyone has the right to be creative and by working together and sharing ideas we can enable everyone to reach their creative potential.
What We Like About This Resource….
“This resource is a lovely example of how words and text can generate ideas, which can then be transferred to paper. Working in this way with children is a great way fo them to engage with literature – and to have an individual response. Try reading poems out loud to a class and ask them to list all the images that spring to mind before exploring those images through drawing”. – Rachel, AccessArt
See This Resource Used In Schools


You May Also Like…
Pathway: Telling Stories through drawing and making

This is featured in the ‘Drawing Stories Through Drawing and Making’ pathway
Rosie Hurley: Esio Trot

Poetry and Printmaking

Found Poetry


 Museum of Contemporary Art, Roskilde, Denmark Photo by Matilde Haaning")


