
Worry dolls are handmade dolls, most often made in Guatemala from wire, wool and small pieces of fabric. The dolls are often tiny, though Western versions can be much larger. Traditionally, the dolls are given to children to help them with their worries. Children will share their concerns with the dolls and then place them under their pillows, where the worries will go away overnight.
AccessArt and Mencap have created three great ways for children to make their own worry dolls. This provides children not only with a great opportunity to practice their making skills, but also to create their own very special “friend” who can listen to their fears.
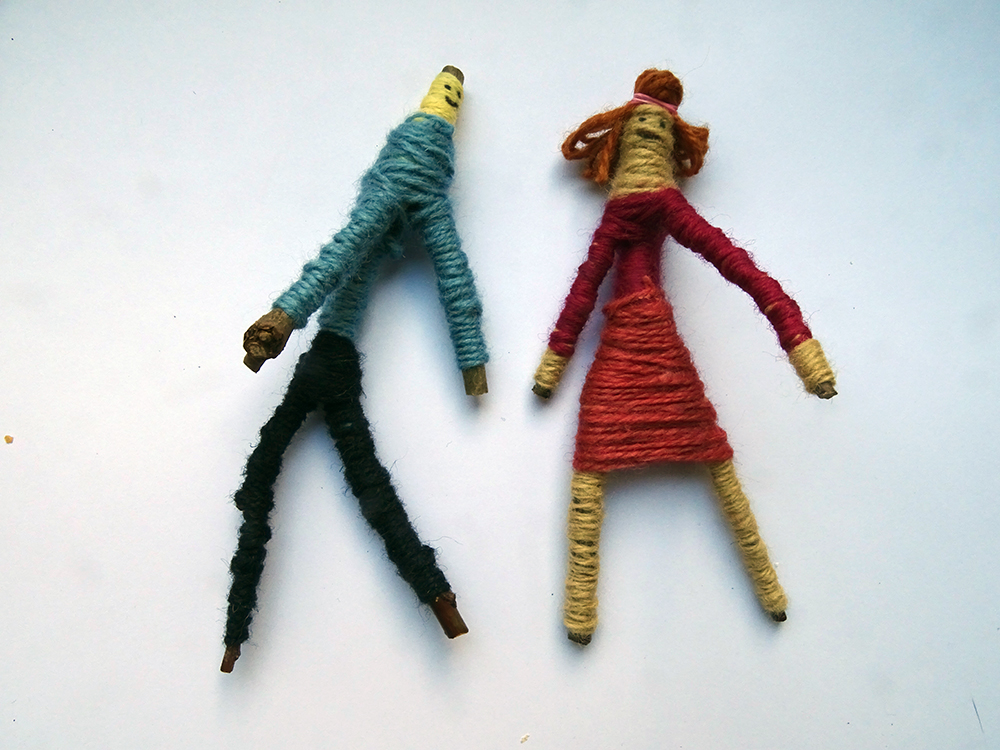
Choose a version from the dolls below – we start with the simplest, suitable for Key Stage 1 children and move on to slightly more complicated versions. The great thing about all these dolls, though, is that they are full of idiosyncrasies and can help teach us to accept and celebrate our differences!

Top Tips: How to Bind the Dolls
Use the tips to help you bind the dolls in wool, whichever version you choose.
Whenever possible, use long lengths of wool to bind the dolls; this will save unnecessary fastening and joining.
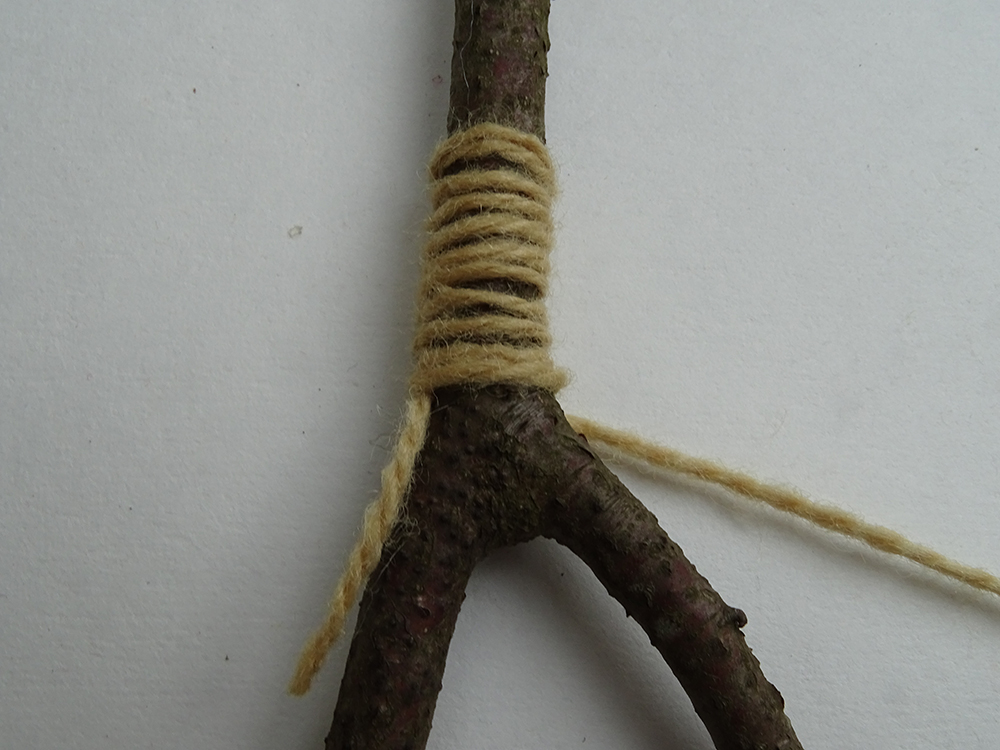
Start by tying a knot around the stick, leaving a 2 or 3 cm length of wool.

Bind the wool around the stick, catching in the length of wool to keep it tidy.
It’s generally easier to make the first knot around the body, then work up to the head, then back down to the body. You can then use the same colour wool to bind the hands: take the same length of wool down the arm to bind the hand, and then bind neatly back up the arm. Repeat on the other side, and if needed, down the legs.
If you are binding lolly sticks you may choose to add a small amount of glue at the head, hands and feet to secure the wool. If you are binding sticks you probably won’t need the glue.
To fasten the wool or change colour, make a simple knot by creating a loop around the stick and passing the wool through it.
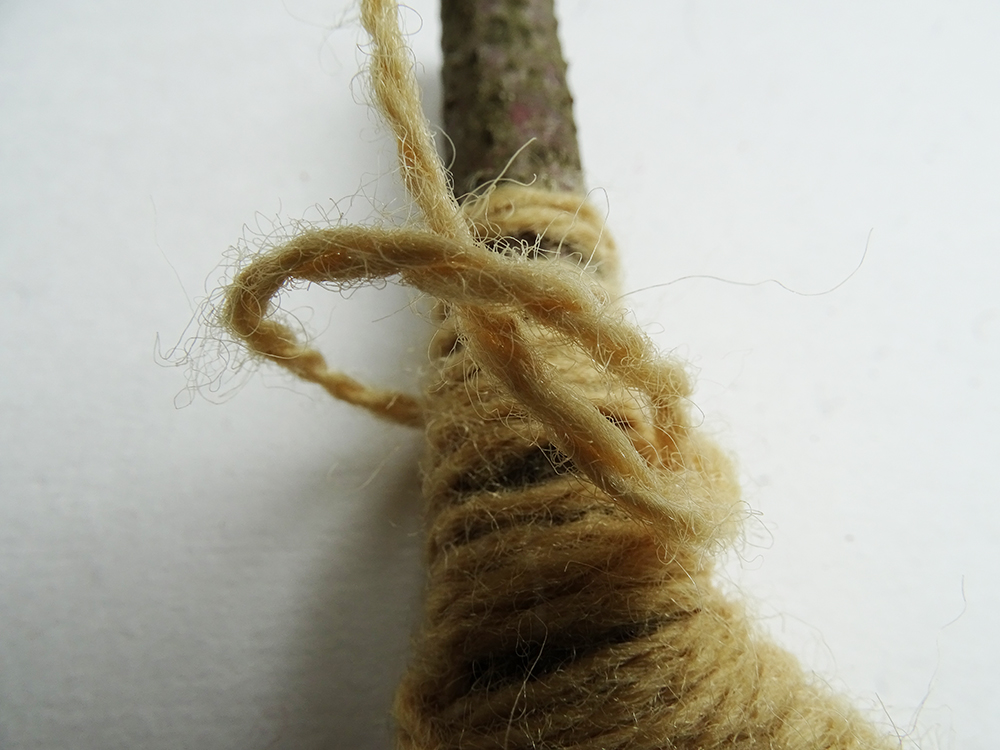
Pull it tight. Cut off the wool again, leaving a 2 to 3 cm length.

Join the next colour as before, again catching in the end of the wool to keep it tidy.
Version One: Using Pipe Cleaners
These are the simplest worry dolls suitable for Key Stage 1 children. Some children may need help or practice to bind the wool around the pipe cleaners, but we encourage you to have a go – it’s important that children get this kind of fine motor skill practice.
You will need:
-
Pipe cleaners
-
scissors
-
wool
-
felt tip pen
Take two pipe cleaners and bend as shown below.
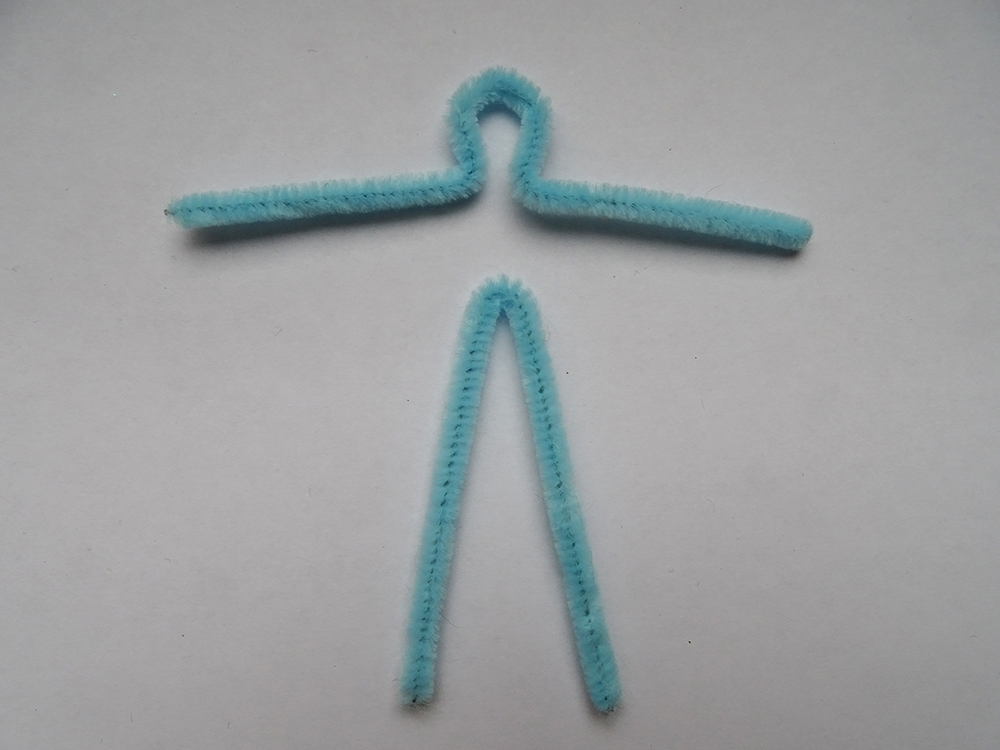
Connect them by twisting the legs around the neck, and then wrap the arms around the body to shorten the arms.

Bind with wool to dress the worry doll (see the binding tips above).
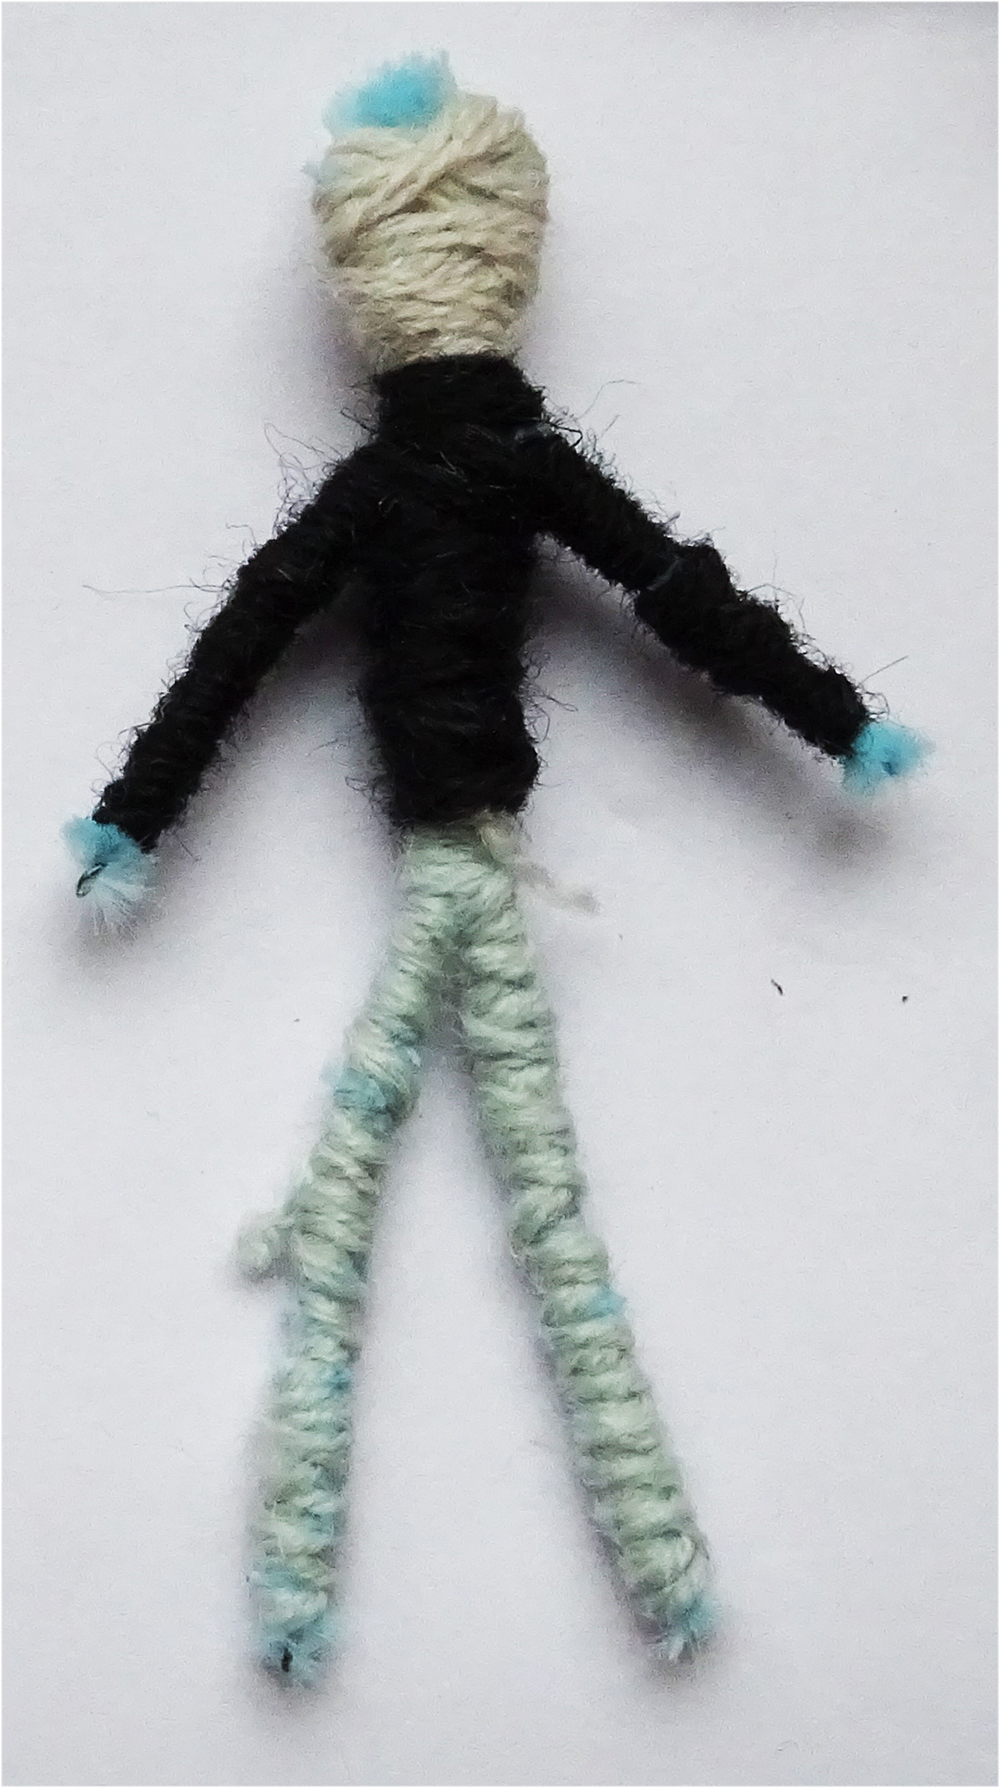
Use colourful wool to dress your doll, and because he is made of pipe cleaners, you can of course, bend him into different positions!
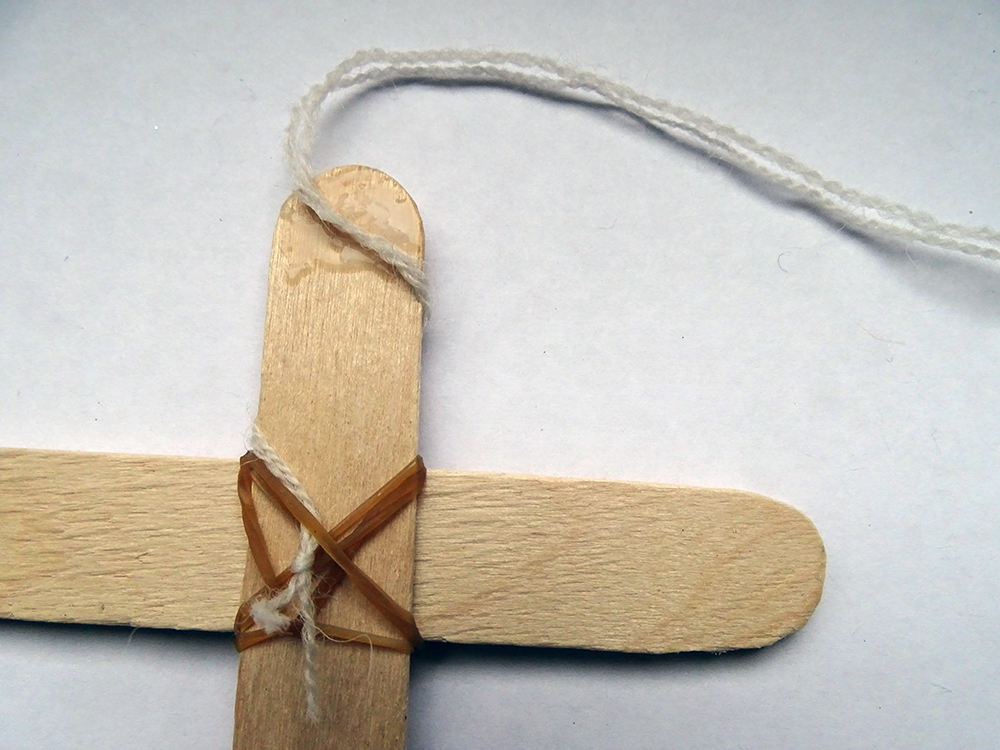
Version Two: Using Lolly Sticks or Simple Twigs
Using larger lolly sticks (available from craft and school supplies) makes it easy for even small fingers to make this version.
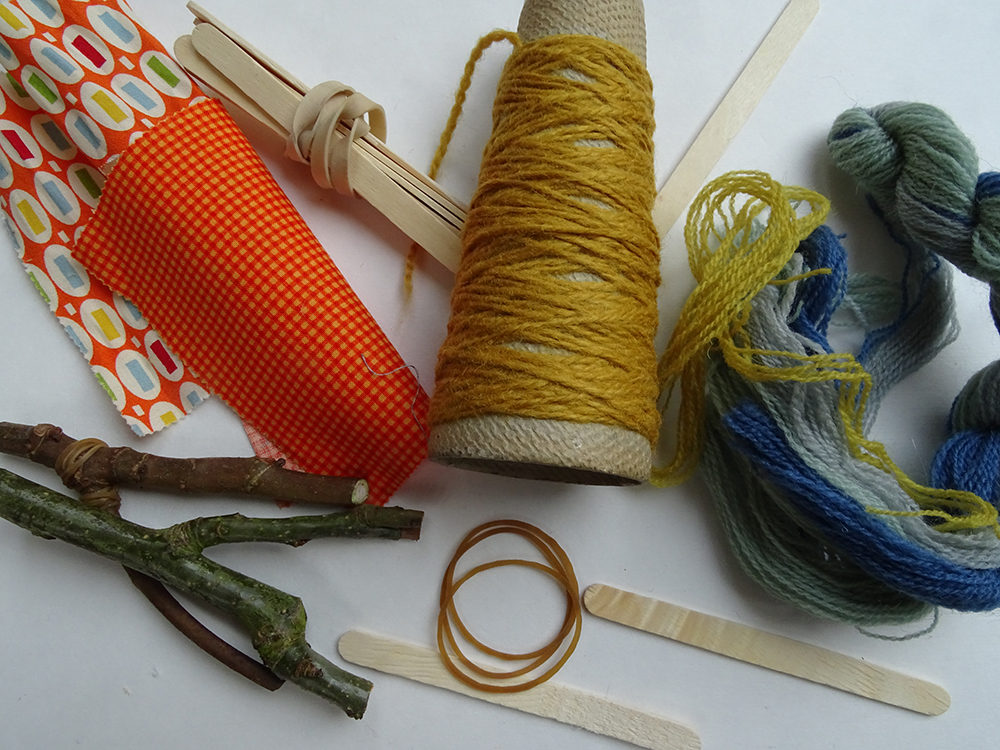
-
Large lolly sticks, or smaller lolly sticks, straight twigs, or even cocktail sticks
-
scissors
-
elastic bands
-
wool
-
fabric
-
glue
-
felt tip pen
Take two lolly sticks or other types of sticks and make a cross shape. Use an elastic band to secure them in place.
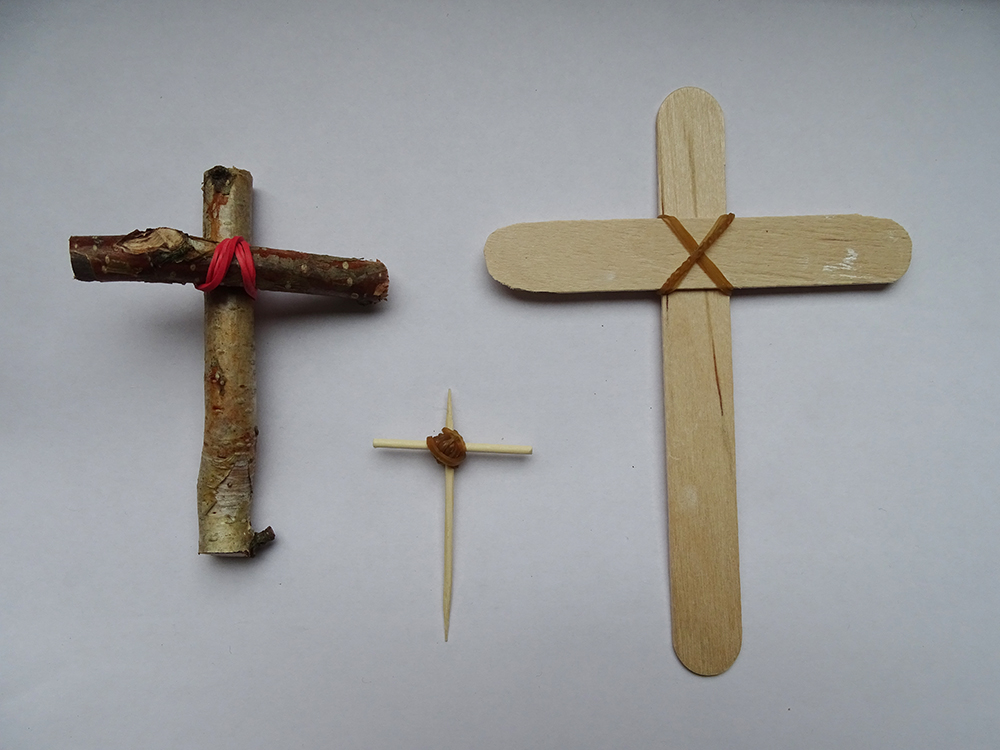
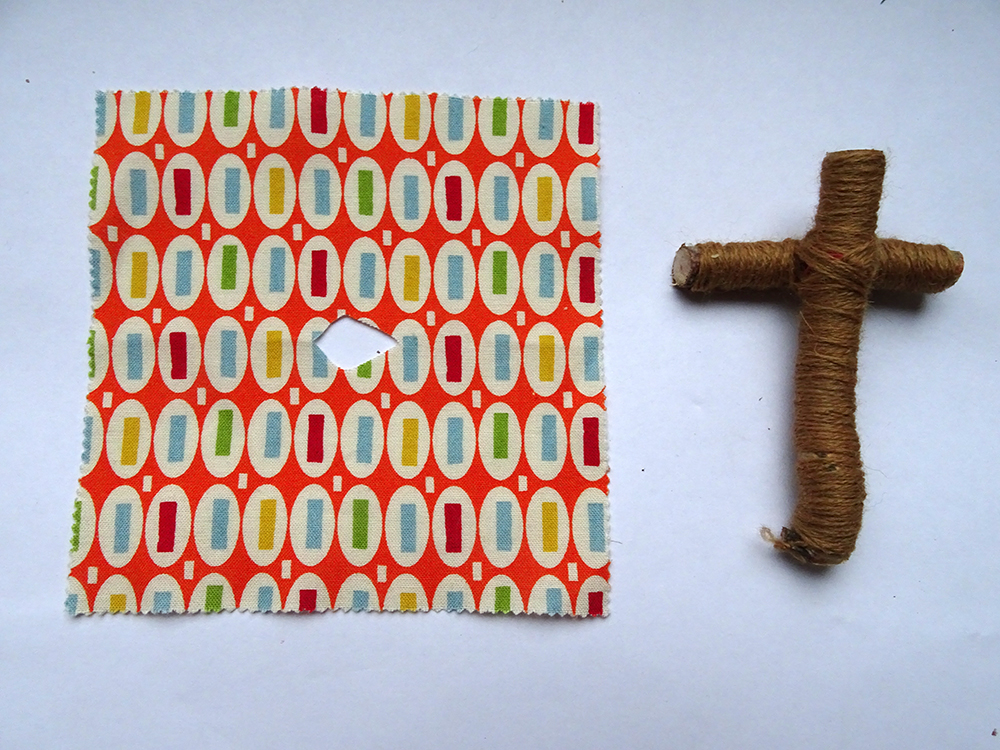
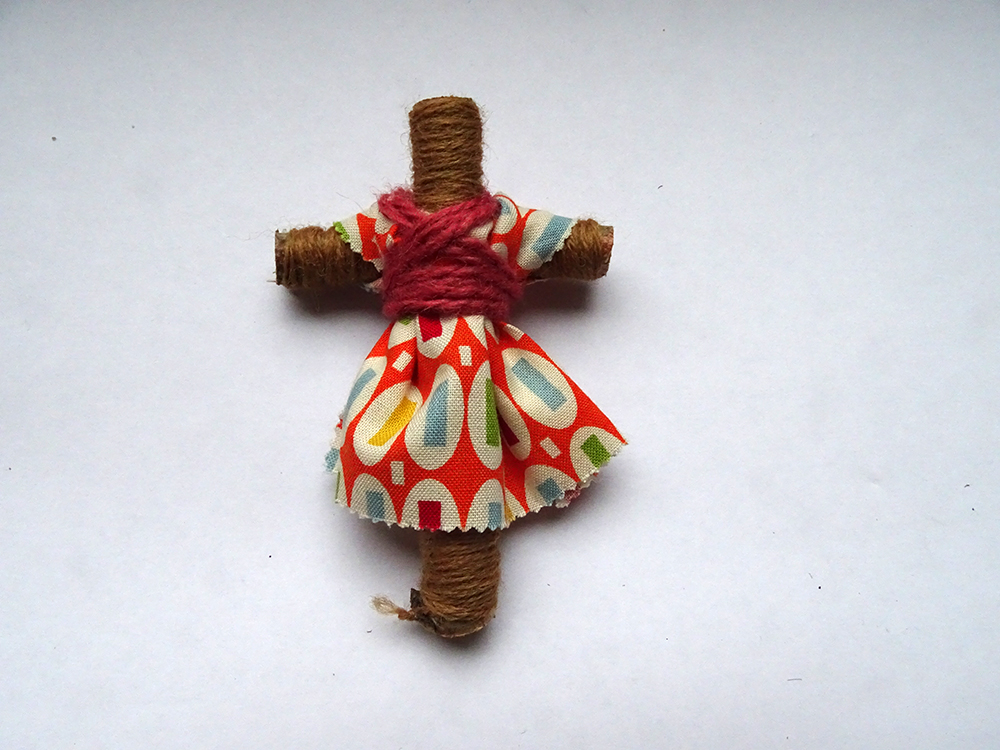
Bind with wool as described in Top Tips! above. You can also use fabric to create simple clothes.
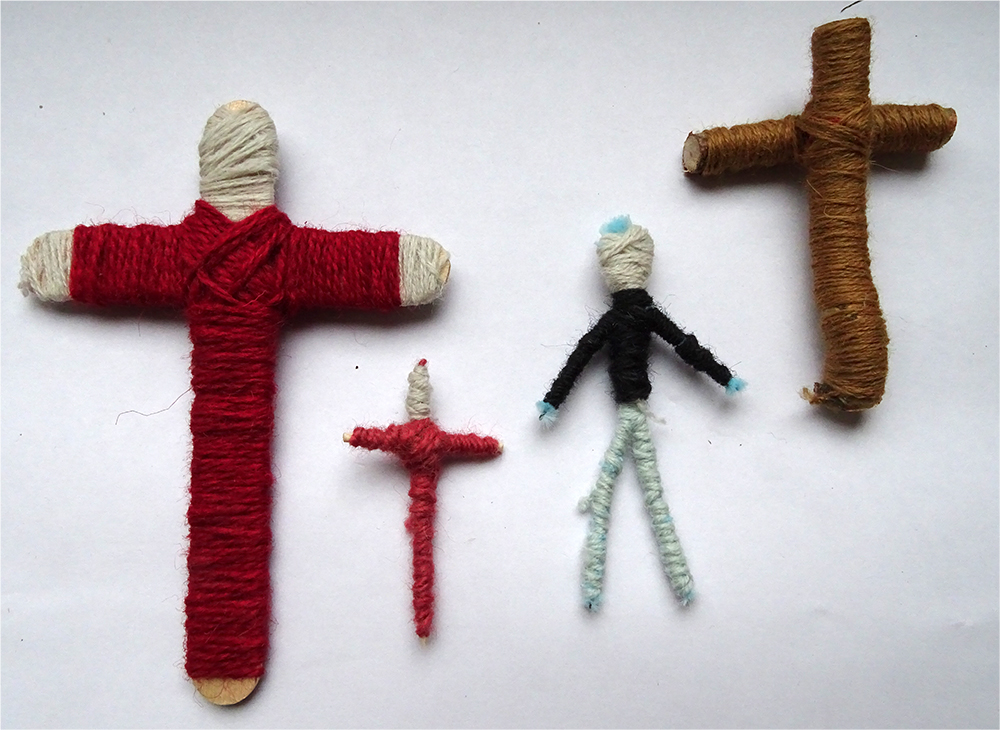
Add simple faces using a felt-tip pen.
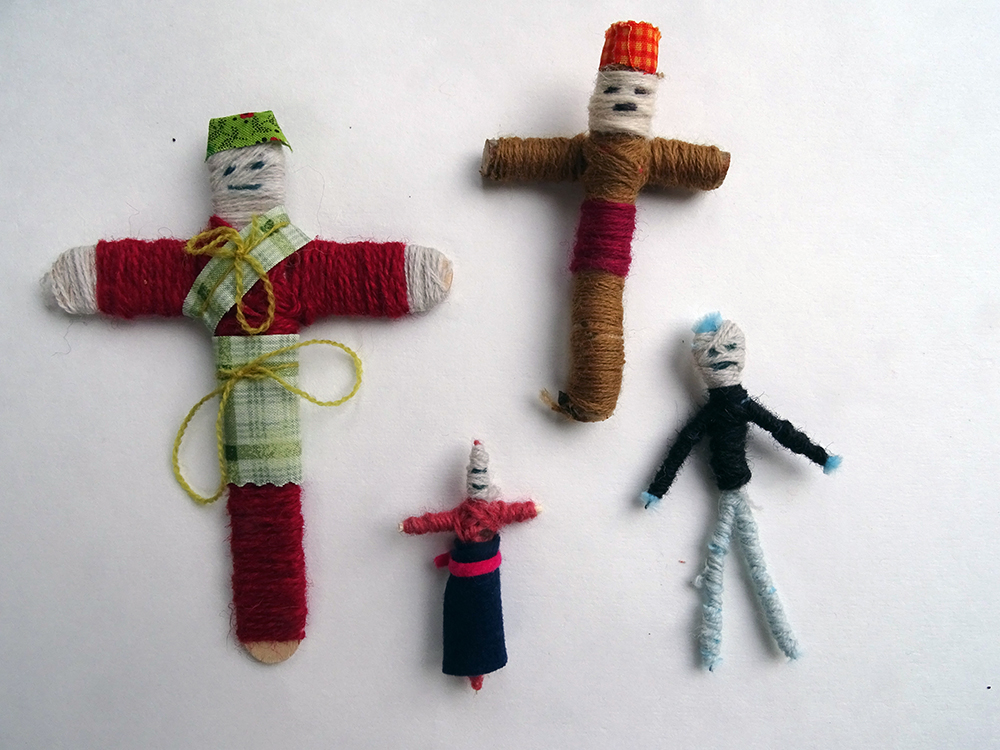
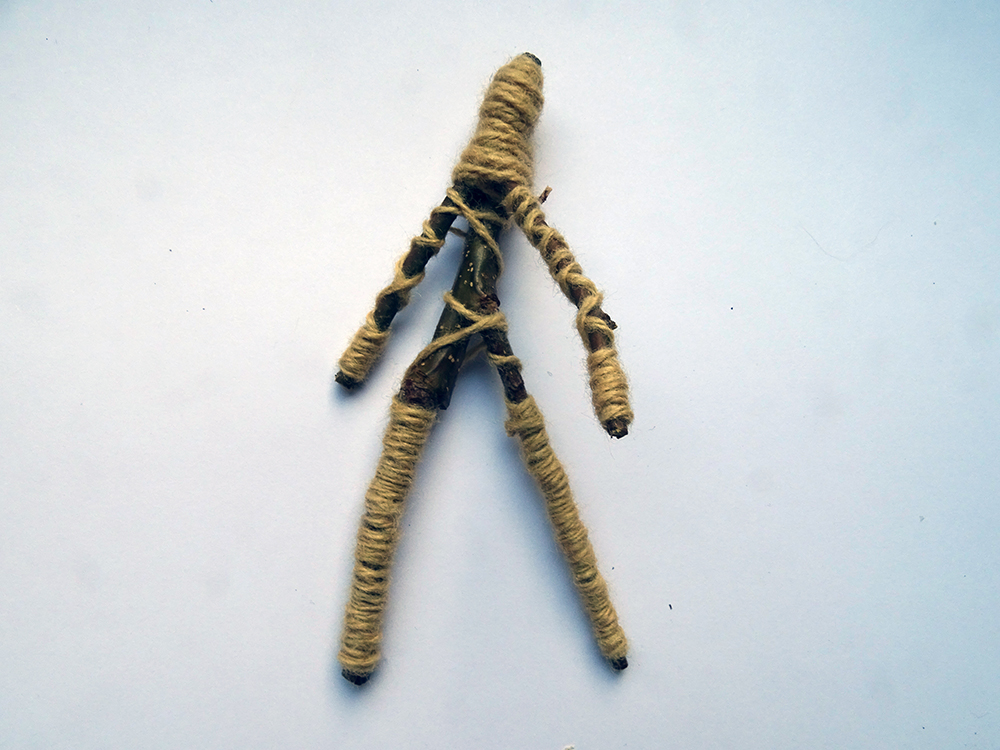
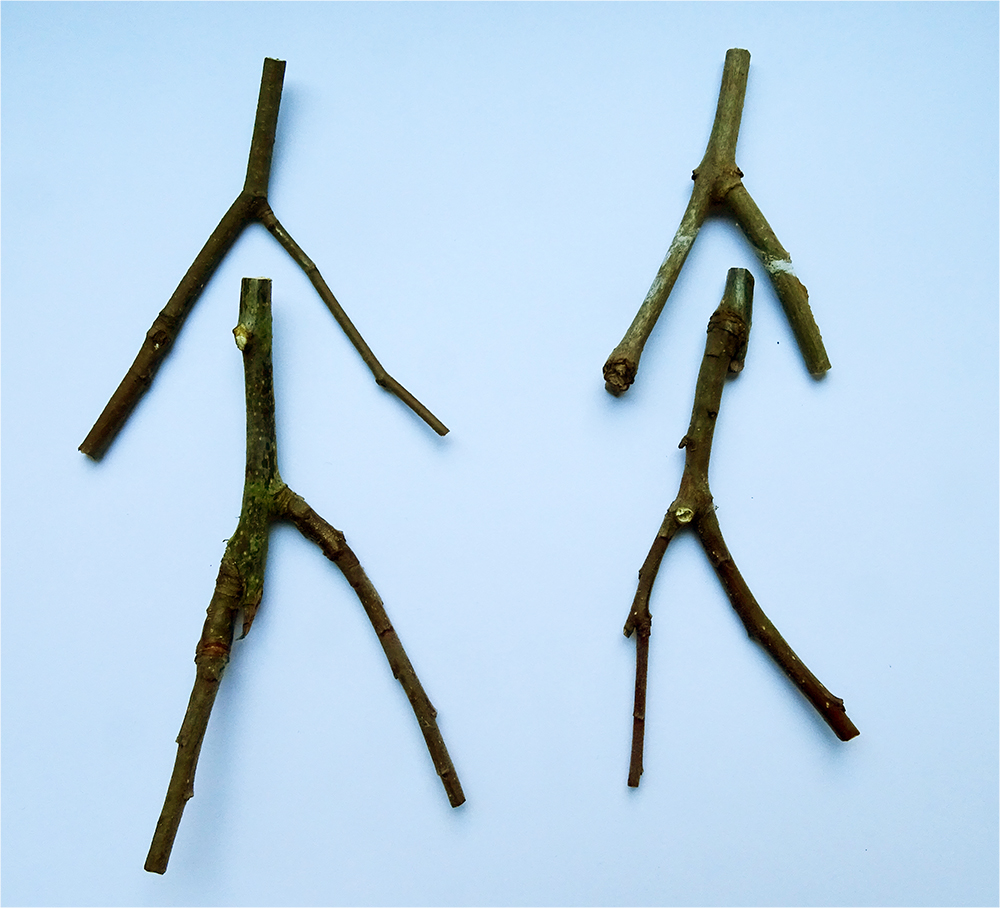
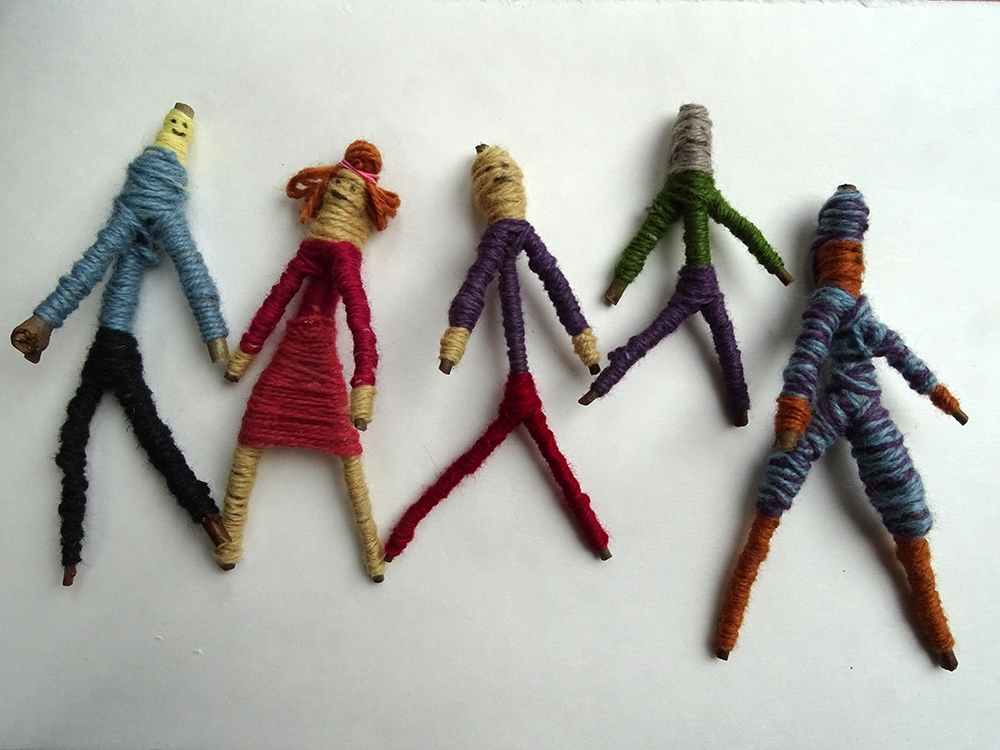
Version Three: Making Stick Man Worry Dolls!
This version is perhaps the most fun and results in dolls with real personality. Look for body-like forms in twigs to help you create a Stick Man version of the traditional worry doll.
-
A selection of “Y” shaped twigs
-
scissors
-
elastic bands
-
wool
-
fabric
-
glue
-
felt tip pen
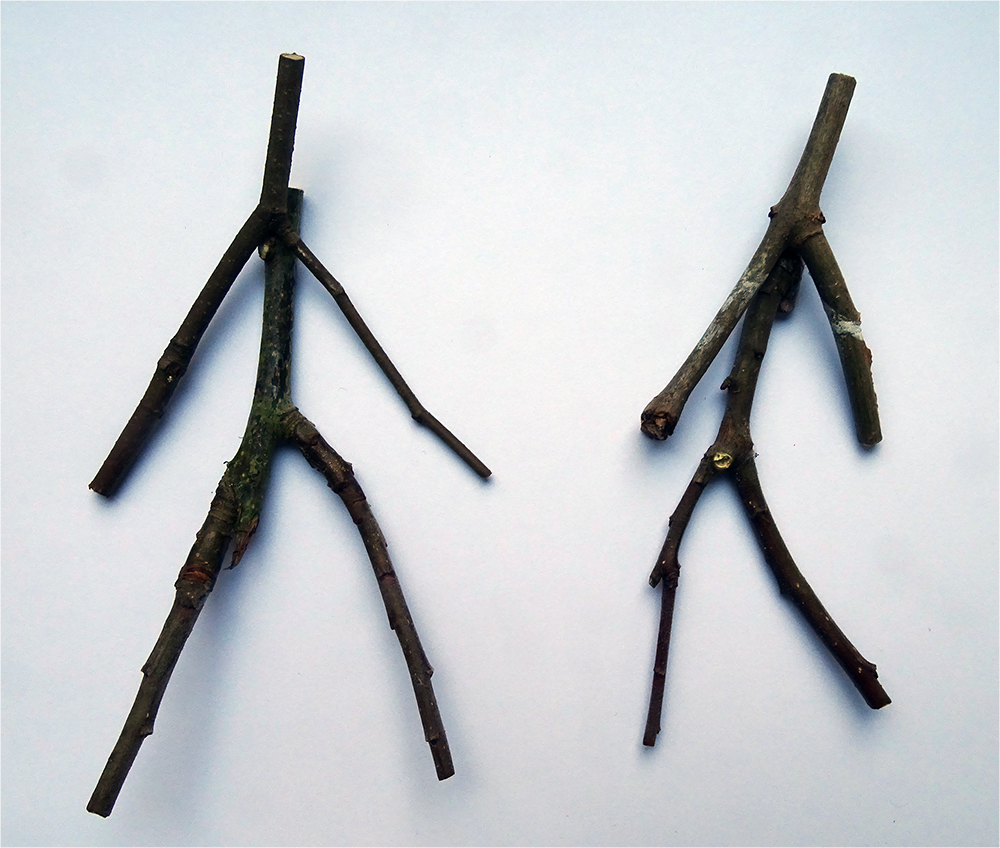
Collect “Y” shaped twigs to help make your stick man. Use secateurs to help trim twigs to shape. Adults might like to collect twigs on the children’s behalf. You will need two “Y” shaped twigs for each worry doll. Top Tip! Try not to use old twigs, which may snap when they are used.
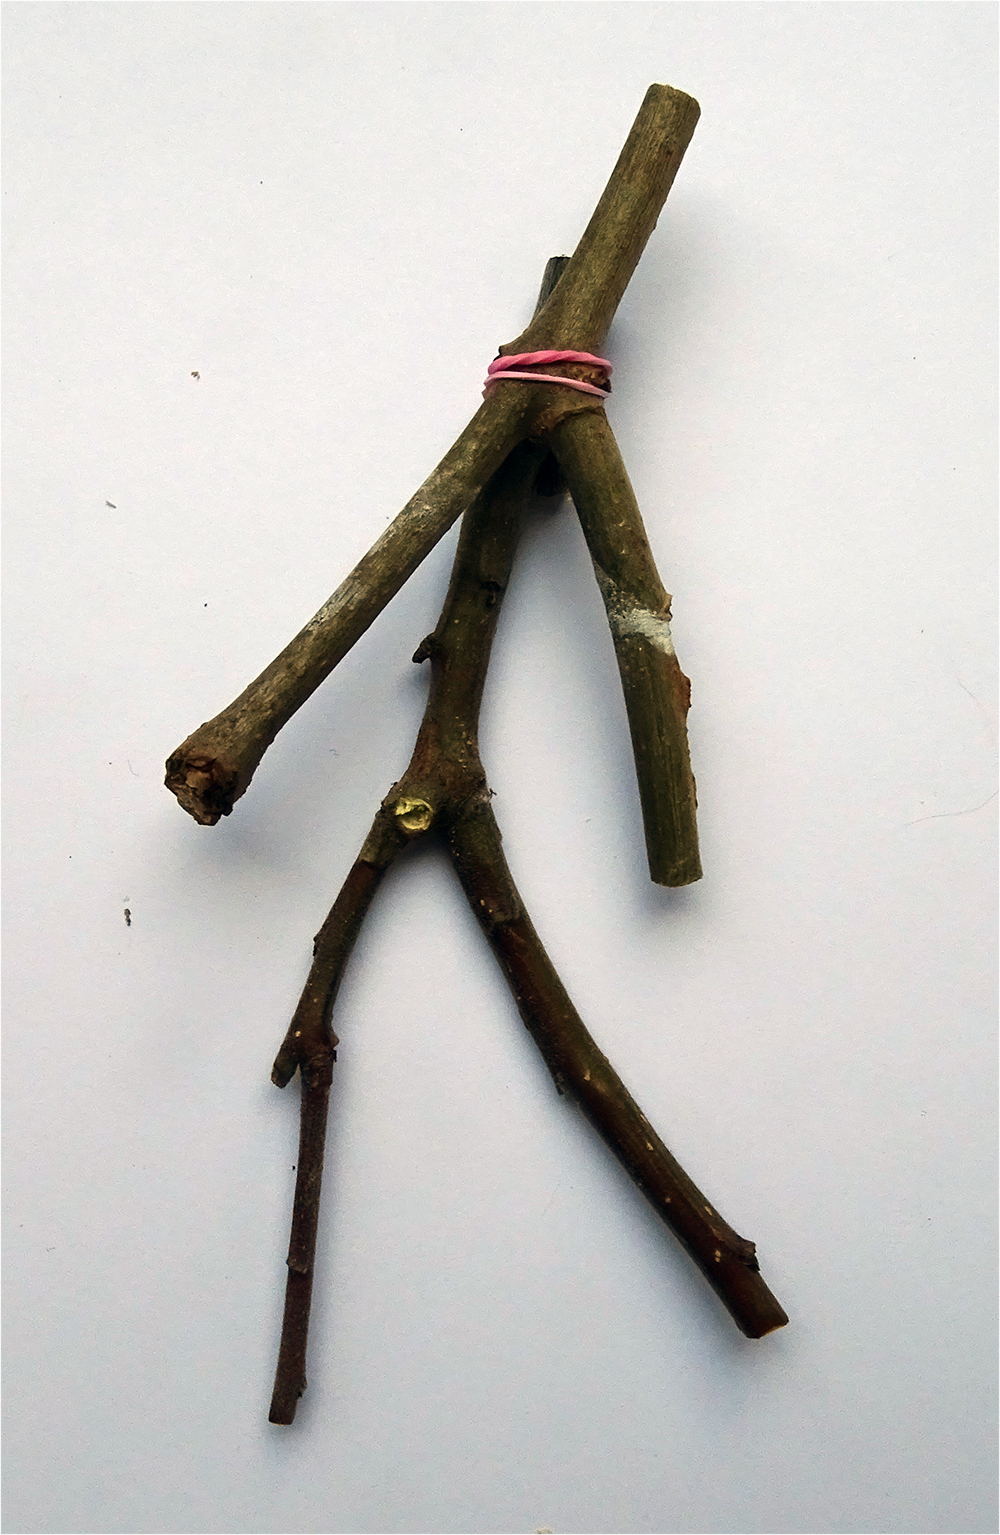
Lay the two twigs over each other as in the image below to make a figure shape.
Secure with an elastic band.
And bind with wool to dress!
When you have made your worry dolls…
Once you have made your worry dolls, think about how you might use them:
-
-
Encourage children to work in small groups to act out appropriate scenarios
-
Use them as a focus for small group discussion about worries. Do you have common worries or worries which you think are unique to you? How easy is it to share your worries? How might we make big worries seem smaller?
-
This is a sample of a resource created by UK Charity AccessArt. We have over 1500 resources to help develop and inspire your creative thinking, practice and teaching.
AccessArt welcomes artists, educators, teachers and parents both in the UK and overseas.
We believe everyone has the right to be creative and by working together and sharing ideas we can enable everyone to reach their creative potential.
See This Resource Used In Schools…


You May Also Like…
Pathway: Stick Transformation project

This is featured in the ‘Stick Transformation Project’ pathway
Talking Points: The craft of worry dolls

talking points: Chris Kenny

Finger puppets

World in a Box


 Date: probably 1613 Medium: Oil on wood Dimensions: 33 1/2 x 24 5/8 in. (85.1 x 62.5 cm) Classification: Paintings Credit Line: Purchase, 1871")

